A Fast and Easy Way to Make Sweet Potato Slips
Sweet potatoes aren’t grown from seed – they are grown from slips. A slip is a rooted sprout from a mature sweet potato. You can order sweet potato slips online or grow your own. You’ve come to the right place if you’re wondering how to grow sweet potato slips.
Begin the process about 8-12 weeks before your planting date for sweet potatoes. Here in the low desert of Arizona, our planting window for sweet potatoes is from March – June.
Article Outline:
- Decide which method you would like to use
- Before You Begin
- Traditional “water method” of making sweet potato slips
- Faster “indoor soil method” of making sweet potato slips
- “Outdoor soil method” for making sweet potato slips
- Next Steps for All Methods

How to grow sweet potato slips: Decide which method you would like to use
There are a few methods for growing sweet potato slips. I’m sharing three successful methods I’ve used.
1. The Traditional Water Method
The traditional method of making sweet potato slips is suspending the sweet potato in water. This method works but often takes 6-8 weeks (or more) to produce slips. Gardening with kids? This is a fun project to do with them. Get more tips for gardening with kids in this article.
Choose this method if you have plenty of time before you plant and don’t have indoor lighting. A bright window works well for this method.
- Pros: Simple
- Cons: Takes longer; requires frequent changing of water.
Jump to instructions for the traditional water method
2. The Indoor Soil Method
In my experience, the indoor soil method of making sweet potato slips is a much faster way to make sweet potato slips. This method usually takes around 4-6 weeks.
Choose this method if you would like slips faster and you have bright indoor lighting available.
- Pros: Quickest method
- Cons: Requires indoor lighting & heat mat for best results. Must keep the soil moist. Chance for potato rotting.
Jump to the instructions for the indoor soil method
3. The Outdoor Soil Method
The outdoor soil method of making sweet potato slips works best in warm climates. This method takes 4-6 weeks once the soil is warm enough.
Choose this method if you have a long growing season and don’t want to bother with starting slips indoors.
- Pros: Easiest method; does not require any upkeep if your garden is already being watered.
- Cons: Soil must be warm before you begin. Areas with short-growing seasons may not have enough time to produce slips.
Jump to the instructions for the outdoor soil method
Before you begin:
The first step for all three methods is to choose a healthy organic sweet potato. Organic potatoes are less likely to be treated with a sprout inhibitor.
Do you have a sweet potato beginning to sprout in the cupboard? Perfect! Now you have a head start in whichever method for sprouting sweet potato slips you choose.

1. Traditional “water method” of making sweet potato slips

Suspend half the sweet potato in a jar of water using toothpicks.
Does it matter which half of the potato is submerged in water when making sweet potato slips? Yes, the rooting end should go in the water. Here are a few ways to determine the difference between the rooting end and the sprouting end:
- Look for small thin roots on one end. This is the rooting end.
- One end may be larger with more eyes. This is the sprouting end.
- The end of the sweet potato that tapers is typically the rooting end.
You want the bottom (rooting) half to be immersed in water and the top (sprouting) half above the jar. Roots will form in the water, and sprouts will form in the top part of the potato.
Providing warmth (a seedling warming mat or on top of the refrigerator) and light (a grow light or sunny window) will speed up the process considerably.
Keep the water level up in the jar and keep the water fresh by replacing it every week or so. Within a few weeks, roots will develop first, and then sprouts will start to form on the suspended potato.

Once several 5-6 inch sprouts have formed, see the rest of the directions below.
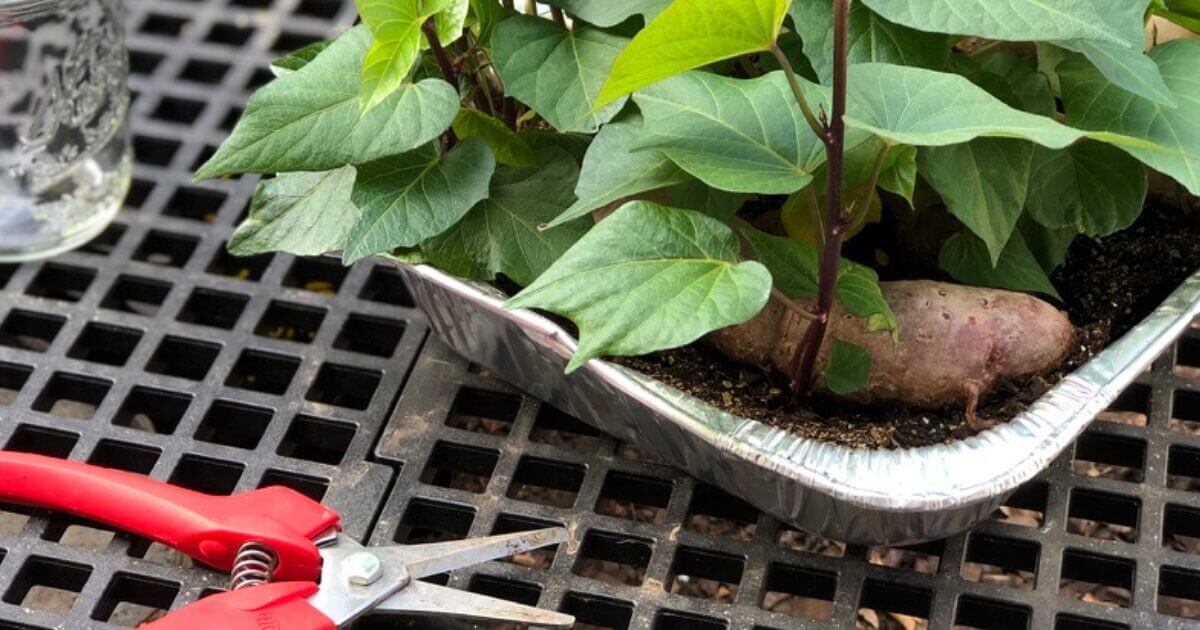
2. Faster “indoor soil method” of making sweet potato slips


- Poke holes in the bottom of a foil pan.
- Fill foil pan with potting soil or seed starting mix.
- Moisten soil.
- Nestle sweet potatoes in soil, covering about half the potato with soil.
- Place the lid under the pan to catch any excess water coming out of the holes.
- Keep soil moist as roots and sprouts form.
Once again, providing warmth (a seedling warming mat or on top of the refrigerator) and light (a grow light or sunny window) will speed up the process considerably.
If the sweet potato becomes soft or rotten, you may need to begin again.


In about a week, if you wiggle the sweet potato, you will feel that roots are forming in the soil. Within another week or two, small sprouts will begin to grow from the top of the sweet potato. Once several sprouts have grown to 5-6 inches long, remove the slip.

You may be able to remove the slip with roots attached. If so, you can go ahead and plant. If there are no roots, go ahead to the next step.
3. “Outdoor soil method” for making sweet potato slips

- Check soil temperature. Once the soil is at least 65°F (18°C), you can begin.
- Moisten soil. This is the soil thermometer I use.
- Bury the bottom (rooting half) of sweet potatoes in the soil, covering about half the potato with soil.
- Use a milk jug or cloche to warm the soil and encourage rooting and sprouting.
- Keep soil moist as roots and sprouts form.
If at any time the potato becomes soft or rotten, you may need to begin again.

Within a week or two, if you wiggle the sweet potato, you will feel that roots are forming in the soil. Within another week, small sprouts should begin to grow from the top of the sweet potato. Once several sprouts have grown to 5-6 inches long, remove the slips from the sweet potato and begin the next step.
Next Steps (all methods):
- When sprouts are about 5-6 inches tall, remove sprouts from the sweet potato by carefully twisting off or cutting off at soil level.
- Remove lower leaves from sprouts and let “root” in a jar of water. Roots will develop quickly; you should begin to see roots in 1-2 days.
- Placing the jar on a seed germination mat for warmth and under a grow light will speed up the process of developing roots.
- Keep the water level high in the jar. Switch out the water about once a week to keep the water fresh. Discard wilted or rotten slips.
- Once roots are fully formed and several inches long, it’s time to plant.
- Plant the rooted sweet potato slips about 12-18 inches apart and 4 inches deep.
- Water newly planted slips well.


One sweet potato will produce a dozen or more sprouts. Allow sweet potato to continue rooting and producing slips until you have as many as you (and your neighbors) need.

Once you’ve grown sweet potato slips, learn how to grow sweet potatoes in this blog post.

Perpetual Vegetable, Fruit & Herb Calendar shows you when to plant vegetables in the low desert of Arizona and whether to plant seeds or transplants. See the planting calendar in my shop.

I just started sweet potatoes inside. they will be on a heat mat under grow lights. do I need to cover until they start to grow slips?
No, you don’t need to cover.
thank you for the info .we live in southern California so I want to put it into soil to get slips .I am amazed at how much I am still learning at 65.God bless and watch over you
Hi Angela. So I started using the water method to grow my sweet potato slips about three weeks ago. The roots began to start showing up after a few days and now the slips have begun to form already but they are not at the top of the potato but rather forming on the sides of the potato, one to two inches below the water level. They look nice and green and some are about 3/4″ tall. Is this normal and do you think these slips forming below the water level will be viable? I’ve transferred it to a container with a larger diameter do there is plenty of room for the slips to grow up past the thicker part of the potato. Thanks!
Yes! They will work. Let them grow. Congrats!
I had a batch of slips I planted in a circular raised bed last early fall. They flourished, and all was well till the temp dropped, but we are in northeast Florida, so it only went to the mid 30s overnight. Despite covering the bed, all the foliage died. Are sweet potatoes annuals or is there any hope of resurrection?
You could dig down and see if they are ready to harvest. If not, I’m guessing as temperatures warm up the vines will take off again because the roots are probably fine.
Hi Angela,
I’m new to gardening and appreciate all your good advice!! I want to start sweet potato slips outdoors but overnight temperatures in Tucson are in the 30s right now. Is that too cold to start slips outside??
The outdoor method is best when its already warm. When it’s cold it is best to use one of the indoor starting methods. Give them light and warmth. Once you past your last frost date and the soil begins to warm up its time to plant the rooted slips outside.
Hi Angela,
I’m doing the soil method and I was wondering once the leave grow, could I just add some soil to cover the sweet potato and let the slips grow from there? And not break off the slips to root and re-plant? I’m growing to eat the leaves, not for the sweet potato. Many thanks!
Absolutely.
@Angela Judd,
A question, not a comment. Will the slips produced from the sweet potato provide the same sweet potatoes as the parent sweet potato used to get the slips from?
Yes.
I stuck a few stringy sweet potatoes in my flowerbed last year and raised some huge potatoes! Why not just use the small potatoes instead of growing slips?
Nice! Of course, that can work too. I’ve had the best success using slips, but there are many ways.
Guess I did mine wrong. I had heard to plant half way so I put mine on their side and as they sprouted the8put on roots to where I could immediately plant when. I separated them from the potato. My first were from a local Gardner. I did read to use organic if you buy from the store
I don’t think there’s a wrong way – lots of great options that all end up with the same result.
Hi! Thanks for all the tips. I have slips that rooted and I planted them in soil a few weeks ago. The one leaf on the slips is still pretty and green however it’s not growing at all. Did I plant them too early or do I just need to wait longer? Thanks for your help
If the leaf is still alive there are roots growing below the soil and you will see growth above ground soon.
I think I want to try the in ground method, since we live in Georgia in the mountains (Zone 7a) and the soil is warm enough to make the slips. What do you mean by using milk jugs or cloche to warm the soil? How far down do you place the whole sweet potato in the soil? thank you
I place the sweet potato halfway in the soil. If your soil is not warm, using the milk jug on top of the soil over the sweet potato can help to warm the soil and speed things up.
Please, please! Help me to get RID of sweet potatoes, as much as I love them I prefer to buy it at supermarket . The plant is to invading and I would like to use that space (1 1/2 mt. X 3mt. ) to grow herbs, but as much as I pull the plant, they keeps on coming back.
Thanks
Mely
Hi Angela! I am doing the soil method and have the potatoes set up under lights & on a warming mat as specified. I bought organic sweet potatoes and got everything set up one month ago. I’ve kept the soil moist. Nothing has happened so far. At what point do you throw the potatoes out and try again?
If the potatoes are still firm hopefully they are rooting in the soil – give them a little jiggle and see if they are firming up in the soil. They often develop roots first and then sprouts.
Hello and thank you for the tutorial. I started several different types sweet potatoes in potting soil under grow lights. After a few weeks, the all became very soft to the touch. Will they produce or should I start over?
They rotted. Start over.
I appreciate your insights on sweet potatoes, but I have a question. Last fall, I harvested sweet potatoes that I grew in a large container. However, I kept one of the large vines (after removing the potatoes) and stuck the end in a 5-gallon bucket of water and have maintained it through the winter months . . . lots of root growth and the vine portion appears to be healthy. The vine has become “thicker” but not longer (for whatever reason). The question I have is, can I cut the vine into pieces say, 4- or 5-inch, place those pieces (with possibly some leaves attached) into some water, and expect those portions to root or should I just put that one large root mass with the entire vine into the ground/container?
I’m not sure what the difference would be. You could always try it with a couple and experiment.
I started by sweet potatoes in mulch in a plastic container and I have let them grow really tall before I was given your podcast from a friend. The slips are very tall with lots of leaves. I am worried that they are too tall and I will not have very many to plant. Can the slips be cut in pieces and put in water to be able to have more slips? I appreciate your information.
I would keep the slips as is. The sweet potato will continue producing slips and you should have all you need before long for planting.
I live in Tucson and have some soil slips growing. I need to know the best things; best container in which to grow and how much direct sunlight will it need? Our yard has a lot of rock mulch and gets very hot in summer. I do have some spots the morning Sun and afternoon shade. Would this be best?
You’ll find more growing information here: https://growinginthegarden.com/how-to-grow-sweet-potatoes/ At least a 10-gallon container. Morning sun with afternoon shade is great if you can.
FINALLY! An informative tutorial! I can’t thank you enough! Happy Gardening!
Thank you!
Hi – I “topped” a sweet potato by cutting off the part with several sprouts on it. I ate the potato. I put the top with sprouts in the sink (side I don’t use) & have sprinkled water on it here & there. The orange “top” is sprouting roots. Can I plant sections of that top with the sprouts rather than just cutting off the sprouts, thereby utilizing those roots? If so, how long do those roots need to be, before doing so? The sprouts are beginning to make leaves as well.
It’s best to have a rooted slip, but you could always give it a try.
@Melanie,
I did the exact same thing as you did. I cut the part of the potato that was sprouting and put it in a shallow dish with toothpicks suspending it in the water. It grew leaves and then roots grew from the bottom. I have planted them in a large indoor pot and placed it in my south facing window in my living room. I live in Wisconsin and thought I’d try growing sweet potatoes indoors through the winter. They are growing like crazy! I’m praying for success and by the looks of all the vines, I believe it will be a great harvest!
@Tina Leonard, hello… growing sweet potatoes for first time. I buy regular potatoes from the grocery store then soak them in cold water for a while and then use a plastic brush to brush the skin of the potatoes hard to get off the inhibitor. .then rinse in clean water . it works.. A sheen of clear oil forms on the surface of the water of the chemical inhibitor that comes off the surface of the potatoe… about 95% of the planted potatoes grow… going to try this with store bought sweet potatoes using the same procedure… do you know if trying this will work for sweet potatoes? Fredrick
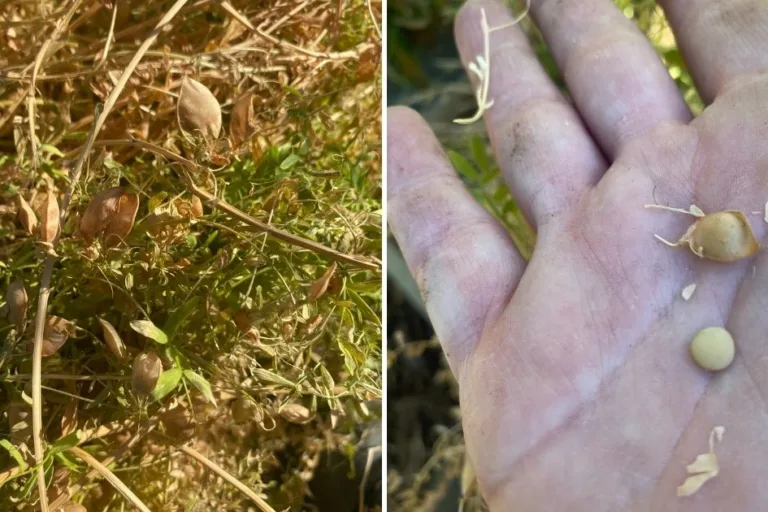
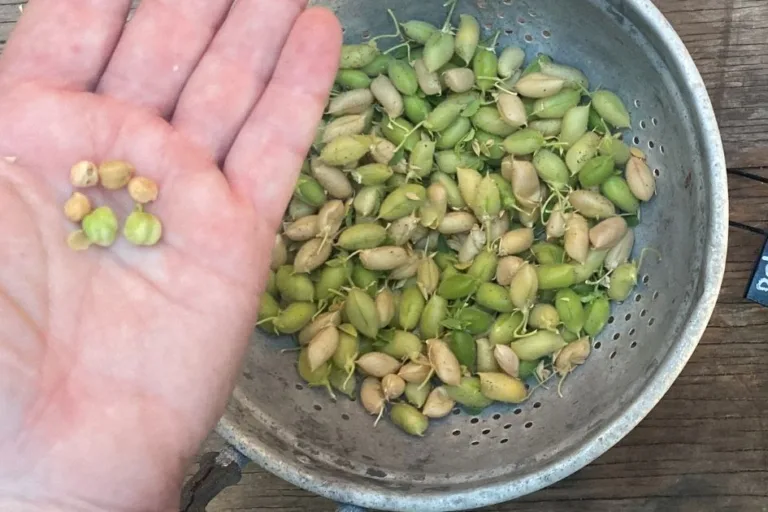
Hello ! I have around 600 or so (purple) sweet potato ‘seeds’.
I plan on planting them in raised containers in the garden.
I do NOT have ‘slips’ ! I have seeds. Is there anything special I need to do with these seeds, in order to have a successful harvest? This is my first venture into growing sweet potato’s?
Thank you in advance!!
I haven’t ever grown them from seed. I’m not sure of the process. Please let me know how it goes.
I started my sweet potato in water and I have a couple of leaves that are dropping. It looks really sad.
Change out the water – make sure it’s getting enough light.
Yes, I am excited to start growing the purple sweet potato slips, thank you for showing both ways in jars or in soil. I will be putting mine in the window.
Great!
My Japanese sweet potato’s are growing purple flowers on the top. Happened quickly.
The two I have in the pan soil method are doing nothing.
Any advice
I’m in sunny South Florida
I’ve done the water method before and actually got the slips from the bottom of the potato.
Plenty of sunshine and rain water
Help!
Hmmm – not sure. I’d try again with different potatoes. Maybe they were treated with sprouting inhibitors.
I live in FL and it’s Aug 10. I put 2 sweet potatoes in mason Jars on window sill. Slips are over a foot+. Not sure what to do! I assume too late to plantern outside?.If I plant in buckets type of soil? How many slips per bucket? Help please
Probably a little late to get a great harvest. When you do put it in a bucket, plant one slip per bucket.
I am easily getting sprouts off my sweet potatoes using the soil method, but when I transfer them to water they rot. Some get a small <1/2 bit of roots but then those stop growing & the slip loses health. Any thoughts? I have changed the water regularly. Thank you!
Are you using soft water? Try to get as much of the slip off the potato as possible by pulling it off rather than cutting it.
I have sweet potatoes in my pantry that have been sprouting for a while now and the sprouts are 4-5 inches long but the leaves are dead on them. Should I pluck off this sprouts and then place my potato in the dirt to start new ones growing? Or leave them and they will still turn out fine? Thanks!
I’d leave the sprouts on and place it in the soil. Those will probably come back to life first.
Good Morning Angela,
I need some help.
I purchased organic sweet potatoes from the store as an article suggested. Burried three of them halfway in growing soil. this was three weeks or so ago. No buds No slips nothing. And the potatoes in the damp soil are hard too. I expected them to start softening.
I’m afraid I won’t get any slips in time to plant.
What do I need to do to make these potatoes grow slips?
Thank you, Mike
Are you providing heat and light? That helps speed up the process. The potatoes don’t necessarily soften, they just sprout. Here’s hoping they sprout soon.
@Mike, I had really bad luck when I used regular mulch for the soil. So I bought some “Jiffy Natural and organic Seed Starting Mix” and it worked SOO good. So the soil you put it in makes a big difference!
Hi Angela! Great tutorial – slips are getting ridiculously expensive to order! I never tried to do it before as the whole water jar method seemed such a pain. I LOVE the idea of growing them in the soil. Question: Does it matter if you use the nicest potatoes you have or not? I know with seed saving they always say to let one of the healthiest plants go to set seed for quality of future plantings; wasn’t sure if the same principle holds true for sweet potatoes? I saw a couple gnarly taters in your soil start photo (lol) and wondered what your experience has been in that regard?
Probably a good idea to use the nicest ones you have. That being said, the gnarly ones I planted sprouted just fine. Best of luck to you.
I did the soil method and they are growing like mad. I had to snip some and place in water. They are developing roots. My question is, I wont be able to plant them outside until May. How do I keep them? Just in water or plant inside then transplant when frost. Is over?
Nice. You can keep the potato growing more slips in the soil and root them closer to your planting date or yes just let the slips develop roots. They will be really long by then for sure.
in setting up the pan, you write, “Place on top of foil pan lid for drainage.” I
think you meant to write, “Place the lid under the pan to catch any excess water coming out the holes.” This is what your video showed, anyway.
Thanks,
You said what I meant, thanks!
Hi , I have rooted several clippings from my summer plants in water. They are well rooted, however, now the leaves are dying off. It is too cold to plant ( Missouri), so how do I salvage what I have left? Should I pot them in small 4” containers until warm enough? Buying in the spring is difficult to find them at the nursery’ & I need them earlier to enhance my planters for the sale of my home. Help would be much appreciated! Thank you!
Sherry
Good idea to use plants 🙂 I would try planting them in soil and giving them plenty of light and warmth until it’s warm enough to plant them out in your planters. Best of luck to you.
How long before planting slips outside should I start the growing process of the slips if I grow them with the soil method? Thanks so much.
Good question. It could take as little as 4 weeks, but I would give yourself 6-8 weeks to be sure you get some good slips. Some potatoes take longer to sprout than others.
Thank you so much for your tutorial I grow potatoes but I wanted to try sweet potato next year. My question is doing the soil method do you have to water and if so how many times a week or just when the soil is dry.
Keep the soil moist, but not overly wet. You can let the top dry out a little, but don’t let it dry out too much.
Soo I placed 2 Japanese purple sweet potato in water AND 2 on the soil. Soil are doing nothing. I see roots but no growth. The water propagation is doing awesome. What’s up with this soil fastest thing ?
Thank you so much
@Caren, I’ve tried both prefer earth over water are you keeping soil moist hmmm could be the potato itself I’ve had some that are really behind or don’t produce slips. Good luck probably good idea to try both to cover yourself
Thank you SO MUCH for this wonderfully well written and illustrated guide!
Question: I have a sweet potato vine, purchased as an ornamental (I eat the leaves in salads). I harvested the leaves nearer the dirt level, leaving a barren space on the stalk of About 6 inches – so I pulled it up, including the root, and placed it in water – covering the 6” of stalk. I’m happy to report the stalk has re-rooted. I now have about 6 inches of stalk with roots. Can I plant this rooted stalk horizontally? And are there pros/cons to planting the stalk horizontally vs vertically? Thank you again for your expert help!
You can plant either way. Sweet potato vine is one of those plants that is so hardy it will root wherever it can. Deeper roots will need watered less often than roots along the top that are more shallow, but either way would work fine.
@Angela Judd,
So does 1 slip yield 1 potato? Thanks!
Hi Tona, One slip will yield one grouping of sweet potatoes. Usually between 6 and 8 that grow together along that root underground.
Hi! Thank you for the tutorial! I am starting sweet potatoes for the first time this year, and they look healthy, but I have a question. I put the tapered end of the sweet potato, which was showing little roots already, down into the water and suspended the tuber with toothpicks. More roots showed up at the bottom and a few slips showed up above the water line. However, most of the slips grew up from beneath the water line, with the roots. Is that normal? Are the slips that grew up from underwater just as usable as the ones growing above the waterline? Did I have the potato upside down? What should I do about all that? Thanks for your help.
Glad it’s working. Yep, any of the slips are fine to use. If they already have roots, even better. Best of luck to you.