How to Compost: A Step-by-Step Guide
The satisfaction you feel as you turn yard and kitchen waste into organic fertilizer that nourishes the soil, your vegetables, plants, and flowers is the reward for learning how to compost.
However, the thought of learning how to compost can be intimidating. The first time I started composting, I was great at growing flies—but not compost. I did not know how to compost and felt like it wasn’t for me. It was too hard, too stinky, and there were too many bugs. Can you relate to any of those feelings?
Fast forward a couple of years. I decided to enroll in Master Gardener classes, where two crucial things occurred:
- I learned the correct way to compost from a local composting expert.
- Volunteering at the demonstration garden gave me hands-on experience learning how to compost.
With this newfound knowledge and experience, I was ready to try again. I applied what I learned and put that knowledge to work, and guess what? I was successful and had fresh compost for my garden. Since then, I’ve added hundreds of pounds of homemade fertilizer to my garden beds.
Article Outline:
- How to Compost: 10 Simple Steps
- 1. Choose a location to compost
- 2. Obtain compost bins
- 3. Gather the correct tools for composting
- 4. Learn what and what not to compost
- 5. Understand the difference between green and brown materials
- 6. Fill the bins with greens and browns
- 7. Observe the compost
- 8. Rotate the compost through your bins
- 9. Use the compost
- 10. Be patient with yourself as you learn how to compost
- Compost Troubleshooting Tips
How to Compost: 10 Simple Steps
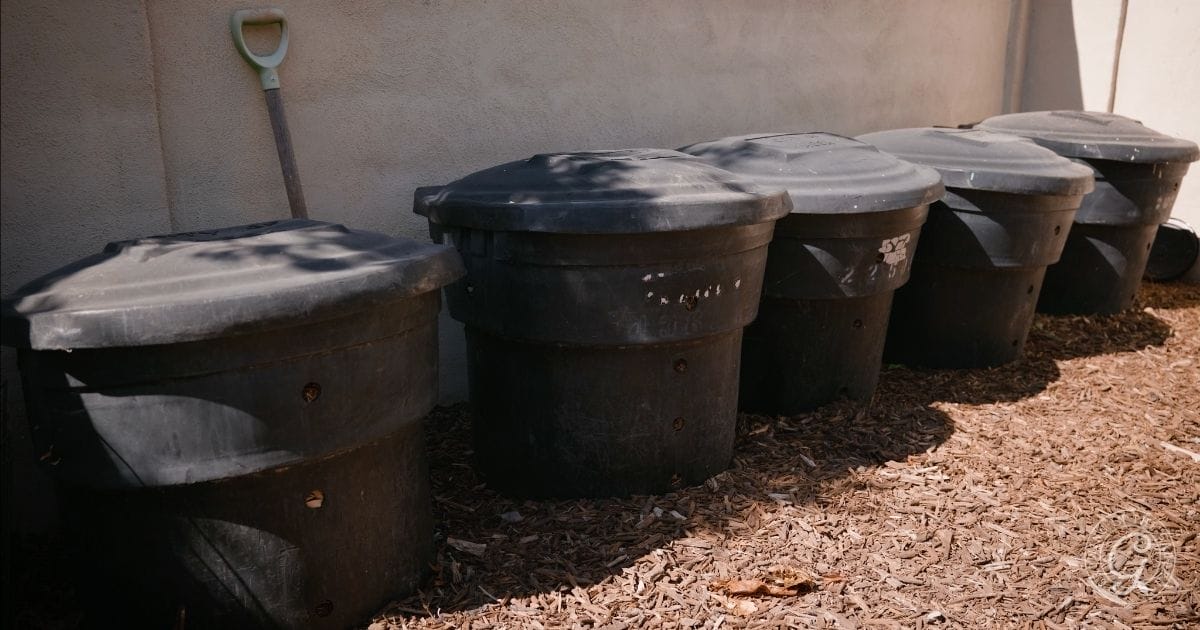
There are as many composting methods as there are gardeners, but this method works for me. I use the type of compost bin offered in my city for $5 each, but this method can also be adapted to other types of bins.
1. Choose a location to compost
Here are a few necessities for the location:
- Plenty of room – the bins I use are 3 feet (.9 m) wide and 2 ½ feet (.7 m) tall. Plan on room for at least 2 bins. Ideally, there is 3 to 4 feet (1 m) clearance in front of the bins.
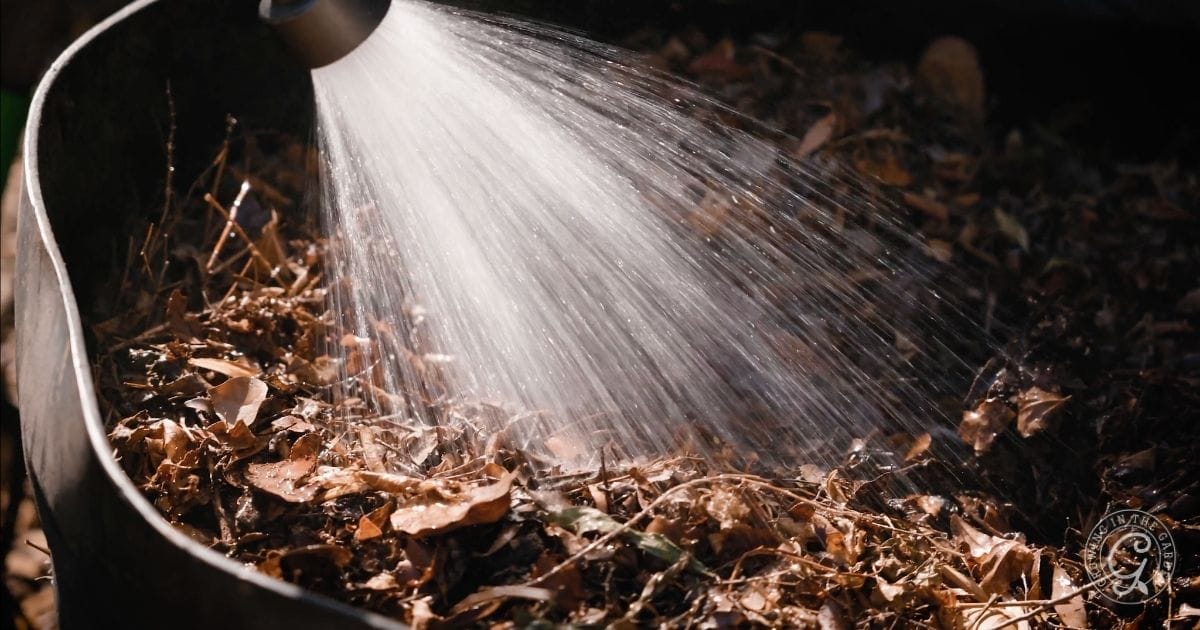
- Access to water – wetting down the compost with a hose helps speed up the process, especially in dry climates like the low desert of Arizona.
- Shade – prevents compost from drying out as quickly and it’s easier for you to work in.
- Wheelbarrow access – room to maneuver in and out is helpful.
Because composting is an important part of my garden, I’ve designed space for it. Here’s how I’ve incorporated compost into my overall garden layout.
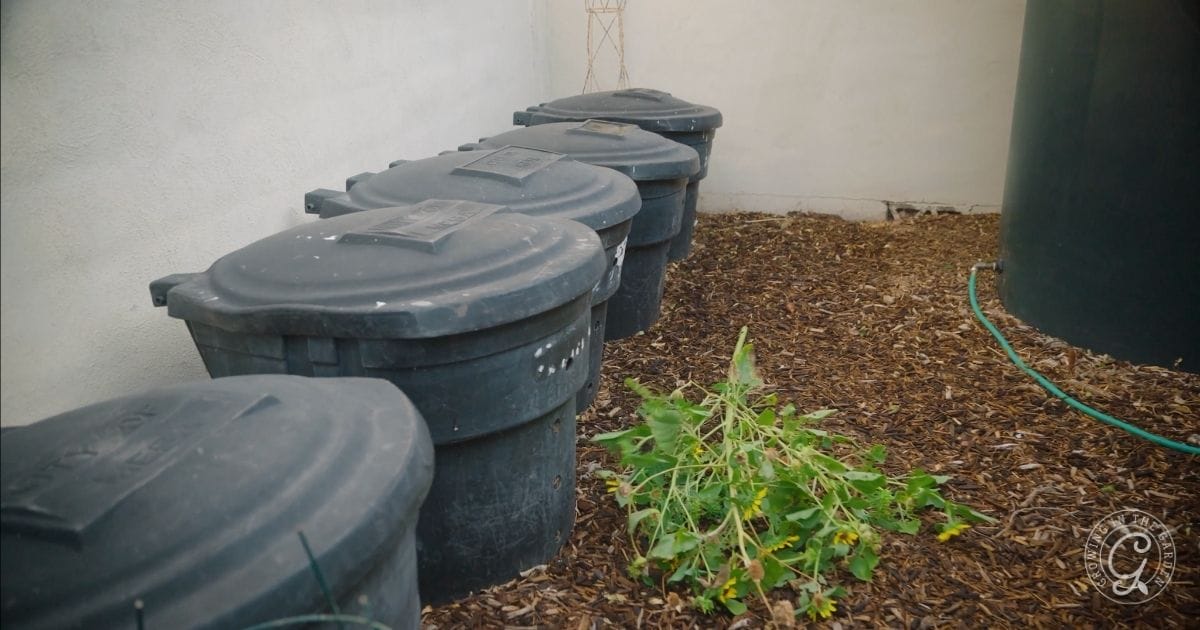
2. Obtain compost bins
The bins need to be around 3 feet (.9 m) wide and 2 to 3 feet (.6 – .9 m) deep (smaller bins won’t heat up as well), have lids, holes drilled in the sides for airflow, and bottomless. For the method I use, you need more than one bin. For smaller yards, 2 bins work fine. Larger yards could use 3, 4, or more bins.
Call your local city to see if they offer bins. This type of bin may also be found online on places like OfferUp and Craigslist. If you live in the City of Mesa (AZ), call 480-644-2221 to request a bin.

3. Gather the correct tools for composting
The right tools make composting much easier. I use the following tools: (click on the name to see the ones I use on Amazon).
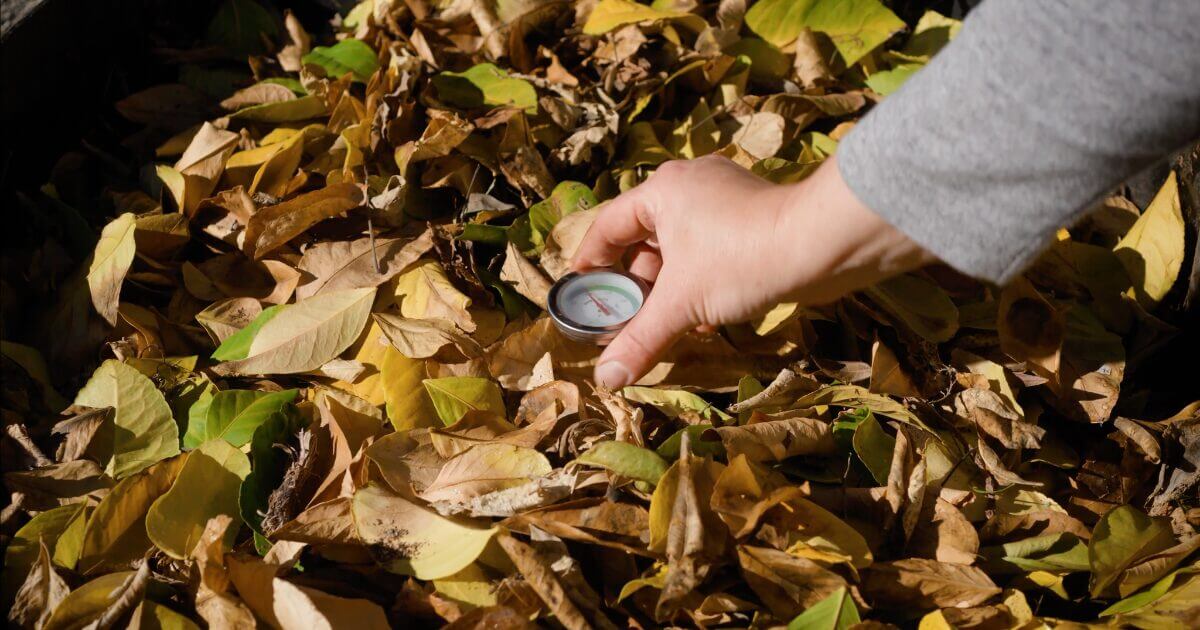
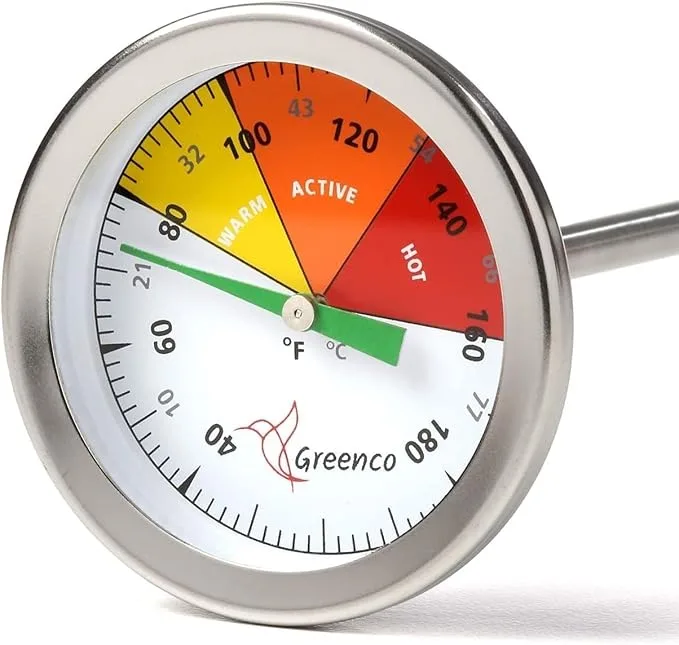
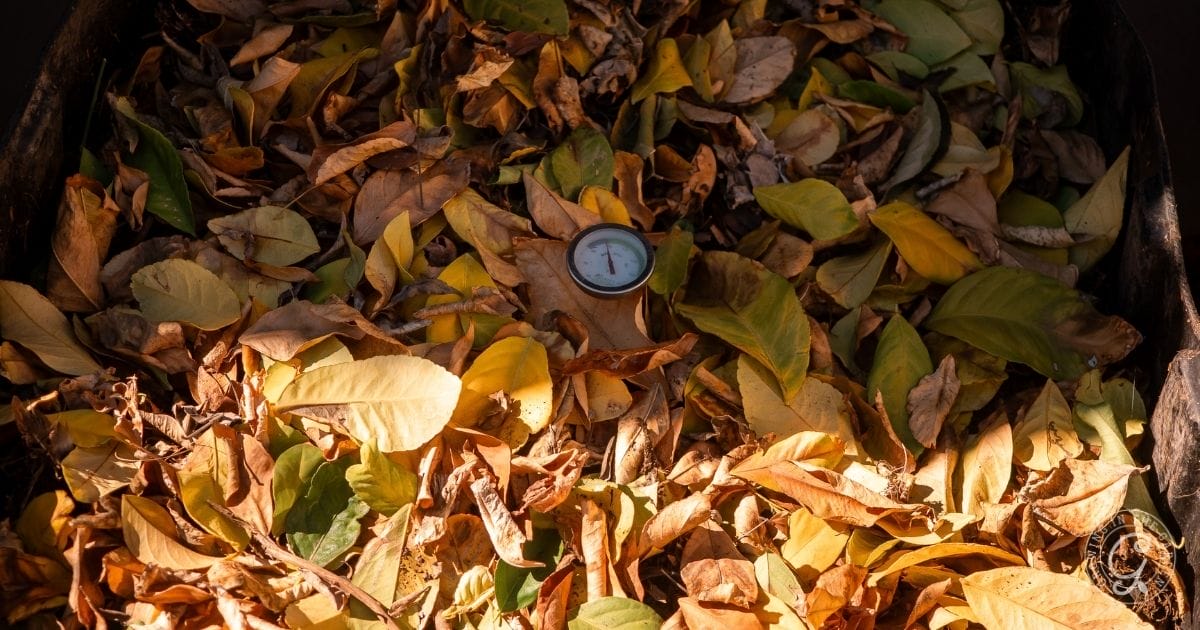
- Compost Thermometer – Monitoring the temperature helps you understand what is happening inside the bins. I’ve had this one since 2015, and it works great.
- Pitchfork
- Scoop-type shovel
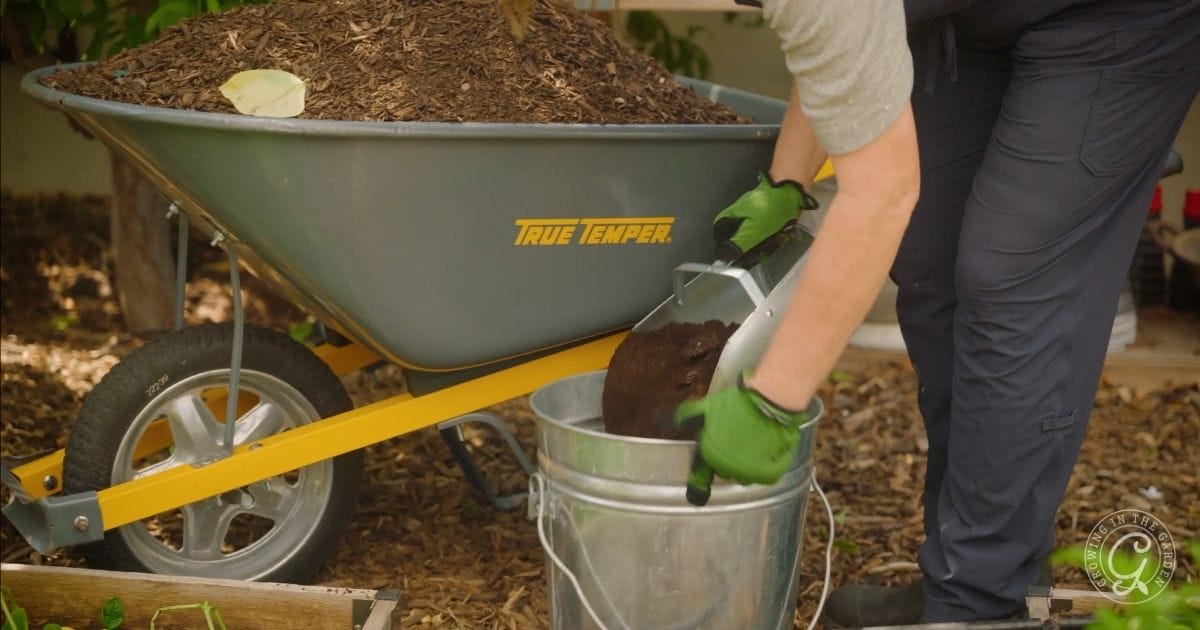
- Wheelbarrow – I love this Gorilla Cart. We added no-flat wheels, and it works great.
- Steel Pails – I use them often in my garden, and they are especially helpful at scooping out compost by the bucketful to add to the garden.
- Hose with a spray wand
- Soil sifter to remove any large pieces from the completed compost.


4. Learn what and what not to compost
| Do Compost: | Don’t Compost: | Compost with Care: |
| Leaves | Meat / bones | Bermuda grass clippings |
| Grass clippings | Dairy | Citrus peels (take a long time to break down) |
| Coffee grounds | Animal waste | Ashes (adds alkalinity) |
| Vegetable scraps | Diseased plants | |
| Egg shells | Oil | |
| Plant material | Weeds with seeds | |
| Fruit and peels |


Tired of your lawn’s high maintenance and water demands? Consider these low-water-use ground covers as lawn alternatives.
5. Understand the difference between green and brown materials
| Green Materials | Brown Materials |
| Nitrogen-rich, wet, colorful | Carbon-rich, dry |
| Grass clippings | Dry brown leaves |
| Coffee and tea grounds | Egg shells |
| Green garden trimmings | Hay and straw |
| Fruit scraps, peels | Shredded paper |
| Vegetable scraps, peels |
If your compost pile needs more “greens,” comfrey leaves are a great compost activator because you can cut them multiple times and add them straight to the pile.


Read this post for more information about how to remove Bermuda grass without chemicals.

Learn other ways to become a self-sufficient gardener in this article.
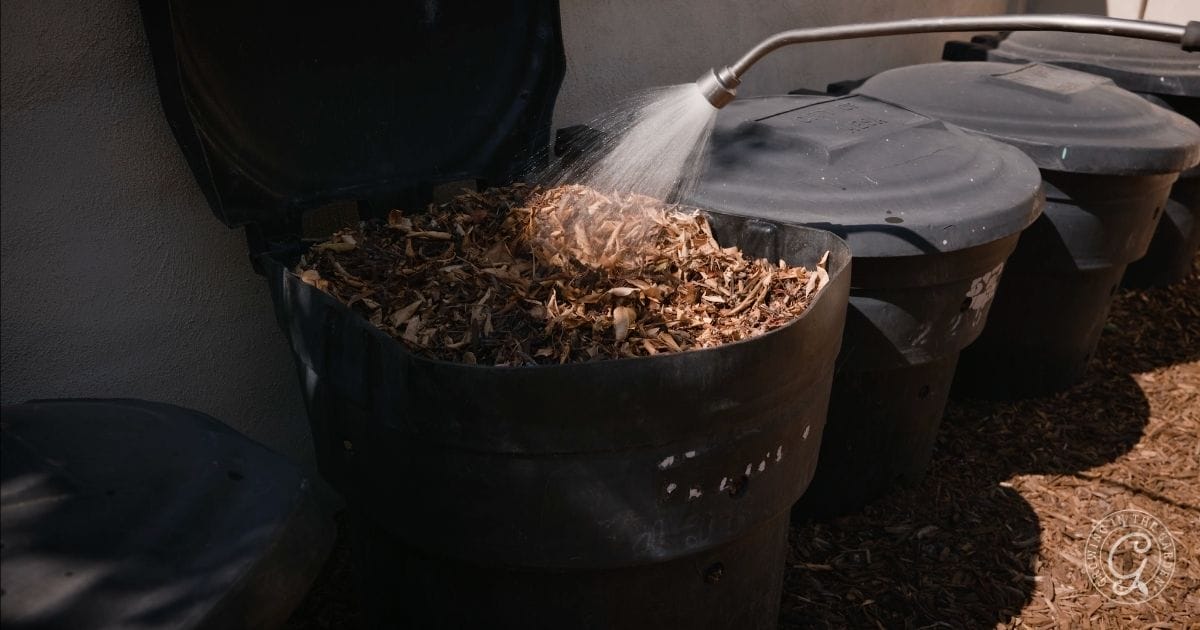
6. Fill the bins with greens and browns
Place alternating layers of green and brown material. Aim for 3 parts brown material for every 1 part of green material. When using food waste, make sure it is buried under a layer of browns to avoid problems with flies.


Mist the layers with water as you add them to assure that the pile is adequately moist. It should have the consistency of a wrung-out sponge.
7. Observe the compost
As decomposition starts, the pile begins to heat up. This is where the thermometer comes in handy. You don’t need to do much as long as your compost is nice and hot (110-160℉ / 43-71°C ). Once it cools (below 100℉/37°C), go to the next step.
See troubleshooting tips (below) if you aren’t sure what is happening inside the bins.
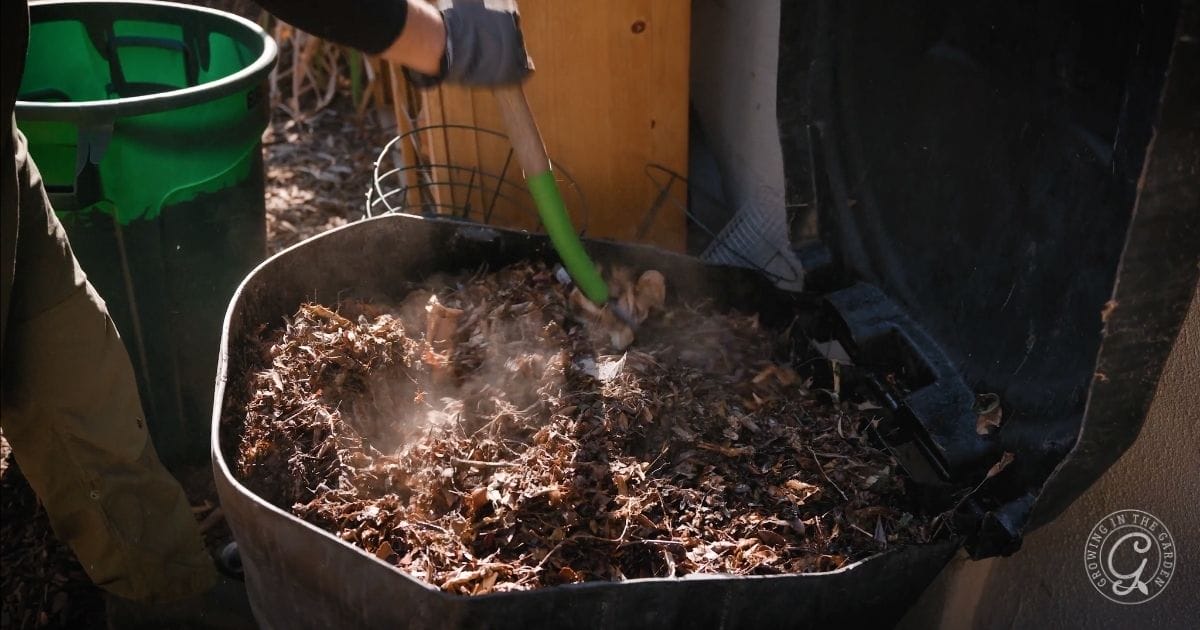
8. Rotate the compost through your bins
Cooled-down compost that isn’t broken down completely needs to have air and water added back into it to heat it back up.
Use the pitchfork and shovel to move the green and brown materials from the cooled bin into an empty bin, re-moistening as you go. Break up any clumps of grass or leaves. No empty bin? Use the pitchfork to turn the material inside the bin, wetting it as you work.
Once all material is rotated through, watch the pile – it should begin to heat back up (110-160℉ / 43-71°C ) within a day or so. When the temperatures drop back down again (below 100℉/37°C), repeat this step. The process is complete once the compost has an earthy odor and is dark brown and crumbly.
This step is why having more than one bin is so important. Ideally, the compost rotates through the bins and then is complete. After moving the material out of a bin, refill it with new green and brown materials to begin the process again. Keep moving the materials through the bins, leaving one bin open to rotate the compost into.


9. Use the compost
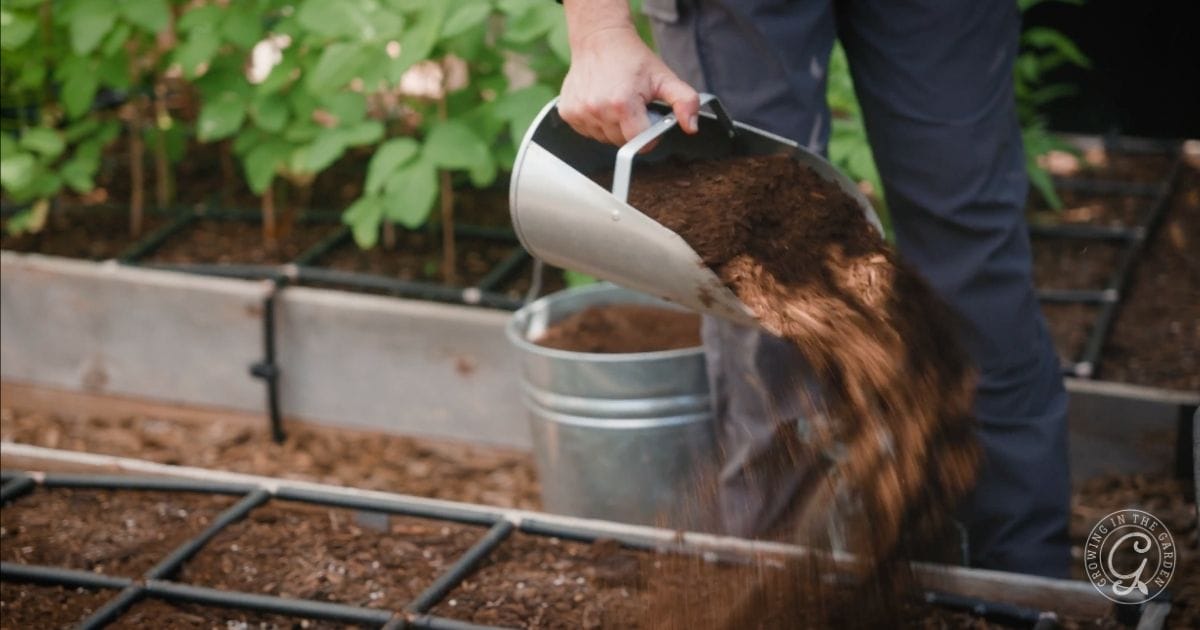
Success! A full bin of completed compost is gold for your garden. Use the shovel, pails, and wheelbarrow to scoop the completed compost and add it to your garden beds. If you’re growing potatoes in containers, add some completed compost to top off the potatoes. They will love it! Compost is a key ingredient when learning how to fill a raised bed, since it improves fertility, structure, and soil life.
If desired, use a soil sifter to remove any large pieces from your completed compost. Toss the large pieces back into the compost pile to finish breaking down.
Compost feeds soil over time, but plants sometimes need more. Here’s how and when to use liquid organic fertilizer when they do. While compost builds long‑term fertility, Nutrient+ offers a quick supportive feed when plants are under stress.
10. Be patient with yourself as you learn how to compost
The tricky part of learning how to compost is that at any given time, you will be doing several of these steps with different bins. Be patient with yourself and pay attention to what is going on in each bin. Learn from your mistakes and build on your successes.
Compost Troubleshooting Tips
| Symptom | Problem | Solution |
| Many flies | Green items or food exposed to air | Cover pile with brown materials. |
| Wet compost – not heating up | Add more brown material | Transfer to a new bin and layer in more brown materials. Do not wet down between layers. |
| Dry compost – not heating up | Materials may be too large, needs more green | Transfer to a new bin and layer in more green materials. Wet down between layers. Cut down larger items if necessary. |
| Bad odor like rotten eggs | Materials too wet, not enough oxygen, or too compacted | Transfer to a new bin and layer in more brown materials. |
| Bad odor like ammonia | Not enough brown materials | Transfer to a new bin and layer in more brown materials. |
| Compost heats up and then cools down | Compost needs turned | Transfer to a new bin, moistening layers as you go. |
| Warm only in the middle | Compost pile too small | Aim for the compost pile to be 3 feet (.9 m) wide and 2 to 3 feet (.6 – .9 m) deep |
| Matted layers of leaves or grass | Material won’t break down, will become slimy | Avoid thick layers – break up layers with pitchfork and remix the pile adding in brown materials. |
Ready to dive deeper into composting? I cover this and so much more in Growing in the Garden Academy. With monthly classes and tips from my own Arizona garden, you’ll get practical advice you can use right away. Join on Patreon and check out my class: Composting and In-Bed Vermicomposting.
If you enjoyed this post, please share it.


You know those biodegradable packing peanuts, the ones that dissolve in water? Can those be put into your compost bin? If so, would they be considered a brown or green? Do you compost them, personally? Thanks!
Hello Angela! Would animal waste from my goats and chickens be considered green or brown? Thank you!
Hi Kelcie! Animal waste such as goat and chicken manure is generally classified as a green material in composting.
Hello Angela! I was trying to research this but am having no luck in finding out if you can compost ficus natida/Indian Laurel leaves? Any info you can provide would be great! Thanks so much!
Sure.
Thank you! For your fist layer against the ground, does it matter if its brown or green? Would fabric scraps (cotton) be a good brown material?
Either brown or green to start is fine. If you use cotton fabric scraps you would want to cut them into very small pieces. Cotton will take longer to break down than most other types of browns.
Hello! I’m setting up to start composting this fall. I found a good location to place my bins, but the ground it would rest on currently receives the flood irrigation my whole yard gets. I imagine this is not ideal. Is it a good idea to elevate that ground enough to keep the base dry? I have the rocky dirt to do it!
It may not be a bad thing and you could use it to your advantage. Keeping compost from drying out it one of the hardest parts of composting. You would have some help! After your irrigation cycle would be a good time to turn the compost. If you kept on this schedule I imagine you would have great compost soon. You may want one bin elevated to keep completed compost in, but I would experiment.
I have been following your gardening advice and find it very helpful. I am struggling with a couple of things like how much to water the raised bed 4×4 using the grid. I just upped it to m-w-f at 15 minutes. Also, I have a turning style composter. It’s not heating up. Need to add browns?
The composter is somewhat small. Need to fill her up?
Thanks,
Karen
How much you water depends on many factors. Right now I’m watering once every 5 days for about 10-12 minutes, depending on the bed and the water pressure. During the summer I water every other day. As it continues to cool down I will water about once a week. For the composting, I don’t have a lot of experience with tumbler composters. If it’s not heating up, I’d look at these troubleshooting tips. I’m guessing you need more mass to get things going. Some people do have success with them, so keep trying.
Good morning! I have noticed that you show 2 different compost containers that are in your beds. The first one is a plastic bucket with a lid and holes and the 2nd one is a metal mesh basket. Which do you prefer and what do you cover the metal mesh with (lid)?
Thank you so much for all the wonderful information. We moved from Oregon 3 years ago and there has been a HUGH learning curve to gardening in the desert. You make it not so overwhelming! THANKS
I first started using the buckets for in bed worm composting. As I implemented it more I realized I liked the mesh baskets better. I don’t use a lid – I use a thick layer of wood chips instead.
@Angela Judd, Thank you so much!
Another question… for the shredded paper, if it’s office type paper with lots of ink printed on it, is that harmful and not ideal?
White paper is normally fine. I’d stay away from glossy type paper, advertisements, etc.
Do eggshells need to rinsed and the membrane removed? And how do you store the greens till you have enough to make a layer?
I don’t rinse the eggshells. If you don’t have enough greens, consider adding vermicomposting bins to your beds. They are an excellent way to use small amounts of greens: https://growinginthegarden.com/vermicomposting-made-easy-in-bed-worm-composting/
I bit confused. I’m a single gardener with small quantities of greens & browns available. Do I keep layering until the bin is full, then start transferring? It could take awhile to fill the bins.
Yes, it can take a while if you don’t have large inputs. If you have small amounts of greens and browns, then in-bed vermicomposting might be a better option for you. https://growinginthegarden.com/vermicomposting-made-easy-in-bed-worm-composting/
Thank you!!! I am in Mesa too, got one of those black bins, and now I realize left too much green stuff on top. It was a mess, stinking to high heaven, and full of maggots. My husband called it “Hannah’s fly farm”.
Now, you’ve shown me the way. Thankyou!!!
Wonderful, best of luck to you!
@Angela Judd, I have a tree that I think is Senna. Are those leaves safe to compost? I assume oleander leaves are not, since they are poison. Is that correct? Thanks!
I wouldn’t compost oleander leaves, but I do not know about senna.
How do you prevent bees from setting up a hive in the compost bin? It happens to me twice.
Hi. I asked Zach from Arizona Worm Farm to help me with this one. This is his response: “Bees love compost. The only way to stop them from setting up in a residential bin is to bee proof it. Cover any bee size or larger opening with fine mesh so the compost can breath but the bees can’t get in. I find in open bins and wedges like our long ones, we don’t get bees. Those residential turner composters seem to attract them more. And they are hard to use to make good compost.” Hope that helps.
Used your method with gods success until I started composting old potting soil (I’m solely a container gardener). This completely cooled off my compost. How can I balance this to keep my pile going?
I would add more greens to offset all the brown material from the potting soil.
Very precious oooooh
Thank you so much for your information. I tried to compost before but it did not seem right. I will try it again by using your method.
Best of luck to you. Hope it helps.
Thank you so very much for all of your awesome info, I may end up going to Arizona Worm farm since you recommended them, I really have no idea what I’m doing, I don’t want this to be a stressful experience, your info definitely helps a ton!
Gardening can be overwhelming. Composting is wonderful, but don’t feel like you have to make your own at the beginning. There is nothing wrong with purchasing it, especially when we have a great option like Arizona Worm Farm here in the Valley.
@Eva, “Anything worth doing is worth doing wrongly the first time you do it.” from my grandmother
Is it possible to compost using bins with a bottom? I’m 100% new to this.
Yes, there are tumbler types which simplify it quite a bit. Here is a link to one: https://amzn.to/39zdigA You can also compost kitchen scraps in your garden beds with worms – this post has more information: https://growinginthegarden.com/vermicomposting-made-easy-in-bed-worm-composting/
Hi, I didn’t realize the bins from the city of Mesa would be bottomless, I don’t have soil only rocks and I know it’s not clean from dumping dirty mop water and pinesol on the rocks, any suggestions?
Typically you pull back the rocks and rest the bins on top of the soil. I’m not sure about the toxicity of pine-sol. If the pine-sol use was extensive, you may want to pick a different location for the bins.
I got my bins from Mesa but they do not have bottoms. Is this how you store them?
Right, the bins are bottomless. They rest on the soil.