Raised Bed Garden Design Tips
An effective raised bed garden design can turn your unused yard into a productive vegetable garden that is organized and beautiful, too. There’s a lot to consider: layout, materials, soil, irrigation, and more. But don’t be overwhelmed. Designing a raised bed garden doesn’t have to be complicated. Use the guidelines in this blog post to help you design the perfect layout for your space and yard.

Key Takeaways: Raised Bed Garden Design
- A well-planned Raised Bed Garden Design enhances your yard by improving soil quality and drainage, allowing for higher yields and better management.
- Choose a sunny location, considering air and water access, slope, and potential pest issues before placing your beds.
- Use the right dimensions: keep beds 4 feet wide or less, and consider ergonomics for easier gardening.
- Incorporate vertical elements like trellises to maximize growing space and plan pathways to allow easy access and maintenance.
- Fill raised beds with a proven soil blend for optimal growth and install an efficient irrigation system before planting.
What We’ll Cover
- Why Choose Raised Beds?
- 1. Pick the Best Spot for Your Raised Bed Garden
- 2. Maximize Space with the Right-Sized Beds
- 3. Leave Generous Paths Between Raised Beds
- 4. Add Vertical Elements to Add Growing Space
- 5. Plan Your Raised Bed Garden Design on Paper First
- 6. Choose Durable Raised Bed Materials
- 7. Place Beds, Run the Main Water Line, & Lock In Spacing Before You Add Soil
- 8. Fill with the Best Soil for Raised Bed Gardens
- 9. Install Irrigation Before You Plant
- 10. Plant with the Mature Size in Mind
- See My Full Backyard Layout
- FAQ: Raised Bed Garden Design

Why Choose Raised Beds?
- Start with ideal soil. Fill beds with a high-quality mix instead of fighting rocky or compacted ground.
- Better drainage. Elevated soil allows water to drain.
- Plant earlier and manage heat. Beds warm sooner in spring and are easy to shade or cover when needed.
- Higher yield per square foot. Defined edges make intensive spacing, interplanting, and vertical growing simple.
- Less compaction. You garden from the paths, not on the soil, so roots grow freely.
- Water efficiency. It is easy to install irrigation in a targeted area.
- Cleaner start with fewer weeds. Raised beds have very few weeds.
Prefer in-ground beds? Read this post about Sunken Garden Beds.
If you want a clear roadmap for starting your first raised bed from scratch, my 30 Days to Your First Desert Garden course walks through the whole process, start to finish.
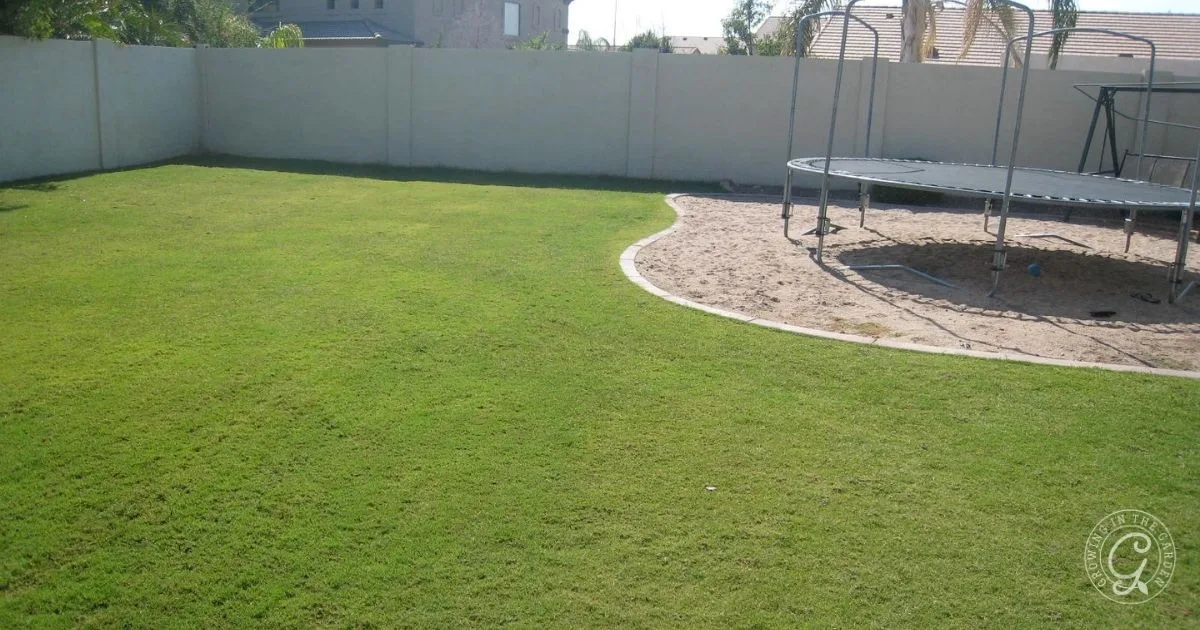
1. Pick the Best Spot for Your Raised Bed Garden
Take your time with this step and really get to know your property. It’s not a bad idea to observe the light patterns in your yard over the course of several months or even a year.
Choosing the right location can make the difference between a productive garden that thrives in all seasons or one that struggles with too little (or too much) sunlight. Here’s what to look for:
- Choose an area that gets at least 6-8 hours of sunlight. Morning sunlight is preferred.
- Think about when you will garden. If you will be gardening during the summer in a hot climate, does it receive afternoon shade?
- Gardening during fall and winter in a mild winter climate? Does the area receive enough sunlight?
Beyond sunlight: quick checks before you place a single bed
- Slope and drainage: Pick level ground or terrace a gentle slope. Do a simple drain test. If water sits for hours, choose a higher spot or raise bed height.
- Prevailing wind and reflected heat: Buffer wind with fencing, hedges, or a trellis wall. Keep beds a couple feet off south or west masonry to reduce radiant heat. Add sturdy anchor points for seasonal shade cloth now.
- Water access: Keep beds within easy hose reach. Plan a protected spot for a timer, filter, and pressure regulator. Run a main line along the garden edge, then branch to each bed.
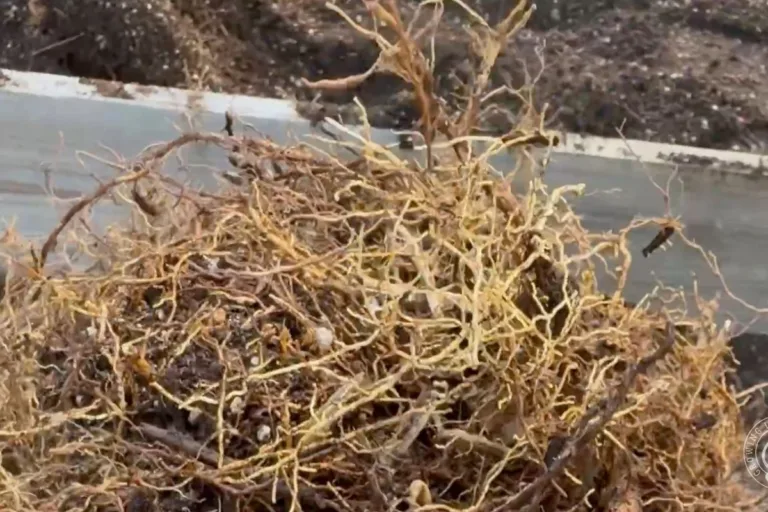
- Trees and roots: Avoid the dripline of large trees and shrubs to reduce root competition and creeping shade. If your only workable location is near a tree or shared wall, plan for tree roots before you fill the beds.
- Pests and utilities: In gopher or vole areas, add hardware cloth under beds. Call before you dig and check HOA rules.
Not sure where to put your beds? I wrote a separate guide that walks you through site selection step by step: How to Choose the Best Location for Your Raised Bed Garden.
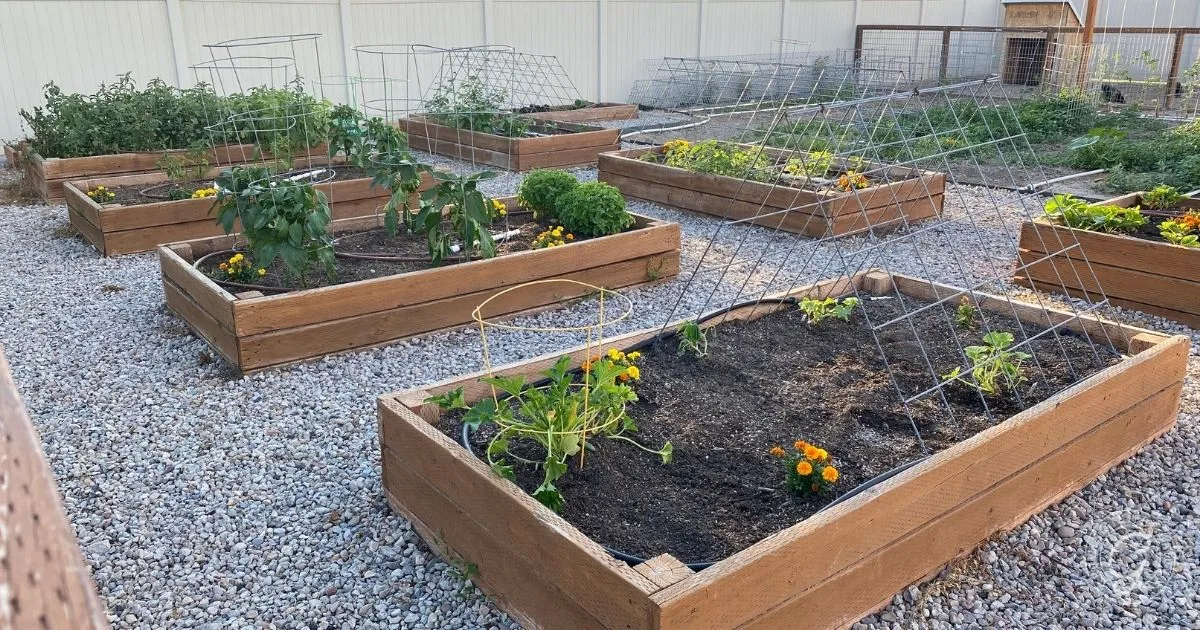
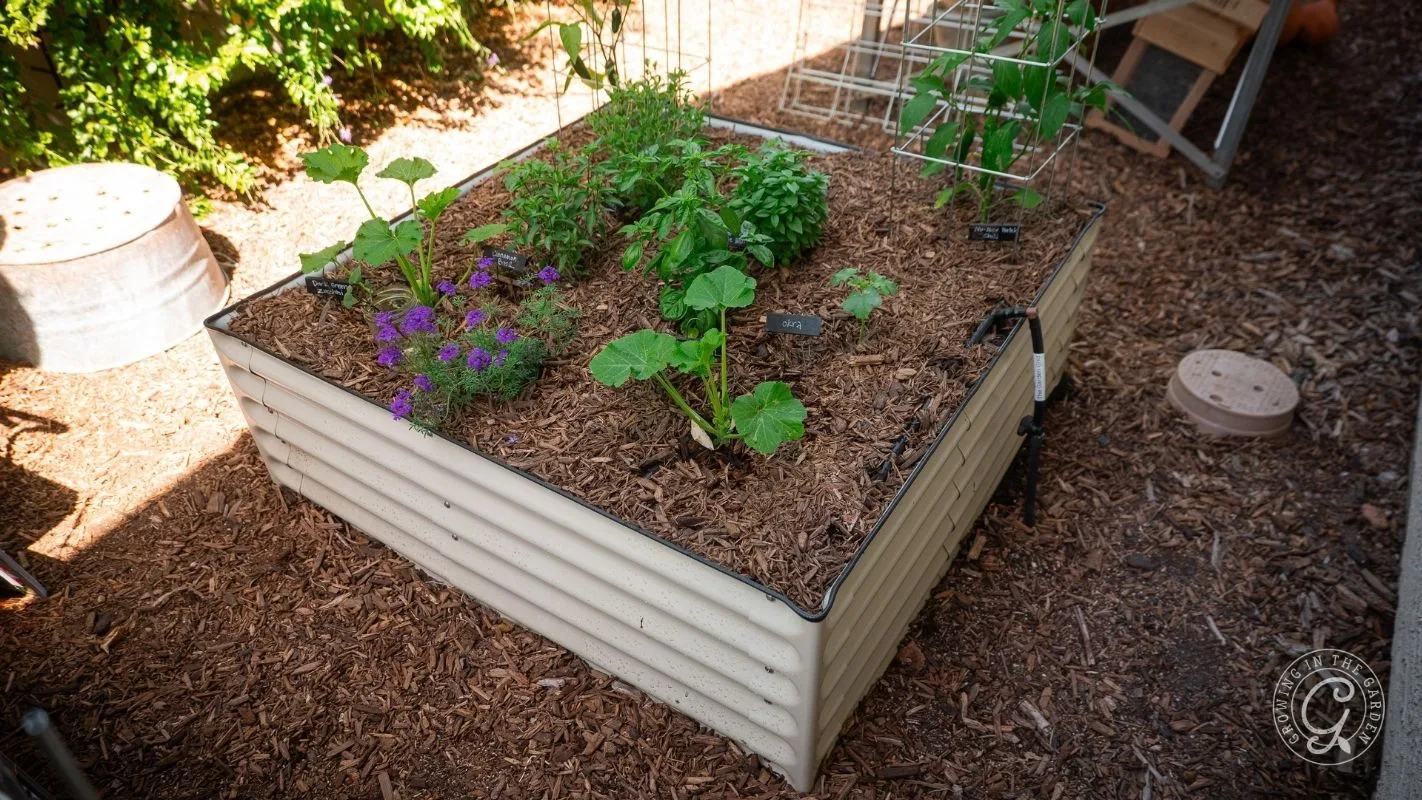
2. Maximize Space with the Right-Sized Beds
- Width: Keep beds 4 feet wide or less so you never step on the soil. Beds along a wall or fence should be 2 feet wide or less. This preserves soil structure and makes maintenance easier.
- Length: Choose any length that fits your site. Longer beds reduce the number of end caps and can simplify irrigation runs, but be sure you can comfortably walk around them.
- Depth: A depth of 12 to 24 inches (30 to 60 cm) suits most crops. Shallow-rooted greens thrive at 12 inches. Fruit-heavy crops, tomatoes, and root vegetables benefit from 15 to 24 inches. Most of my beds are 15 inches deep.
- Ergonomics: Bed height should match your body. Taller beds reduce bending. If mobility is a concern, consider 24 to 30-inch-tall options.
3. Leave Generous Paths Between Raised Beds
Width: Plan paths 3 to 4 feet wide (90 to 120 cm). Three feet wide accommodates a wheelbarrow. Four feet feels comfortable for two people to pass and gives plants room to spill over bed edges without blocking access.
Surface:
- Wood chips are soft underfoot and easy to refresh.
- Decomposed granite compacts smoothly and drains well.
- Pavers create clean edges and reduce mud.
Function: Keep at least one utility lane wide enough for a wheelbarrow, garden cart, or hose reel. If you plan arches between beds, measure the footprint of the arches to keep paths centered.
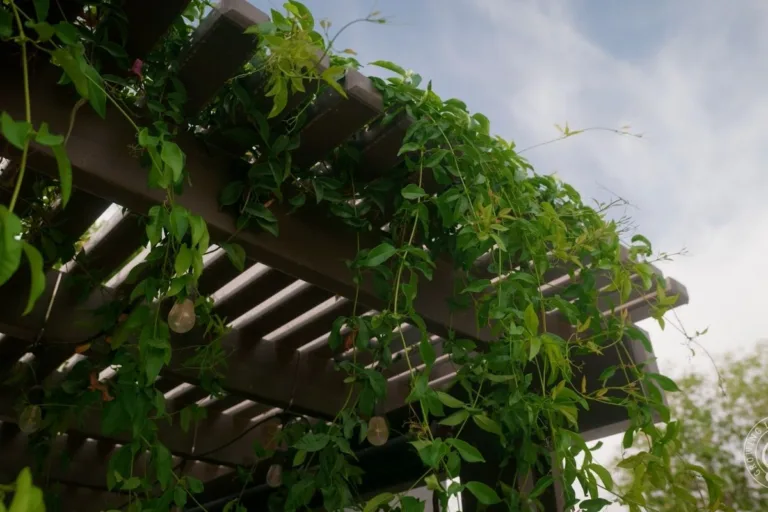
4. Add Vertical Elements to Add Growing Space
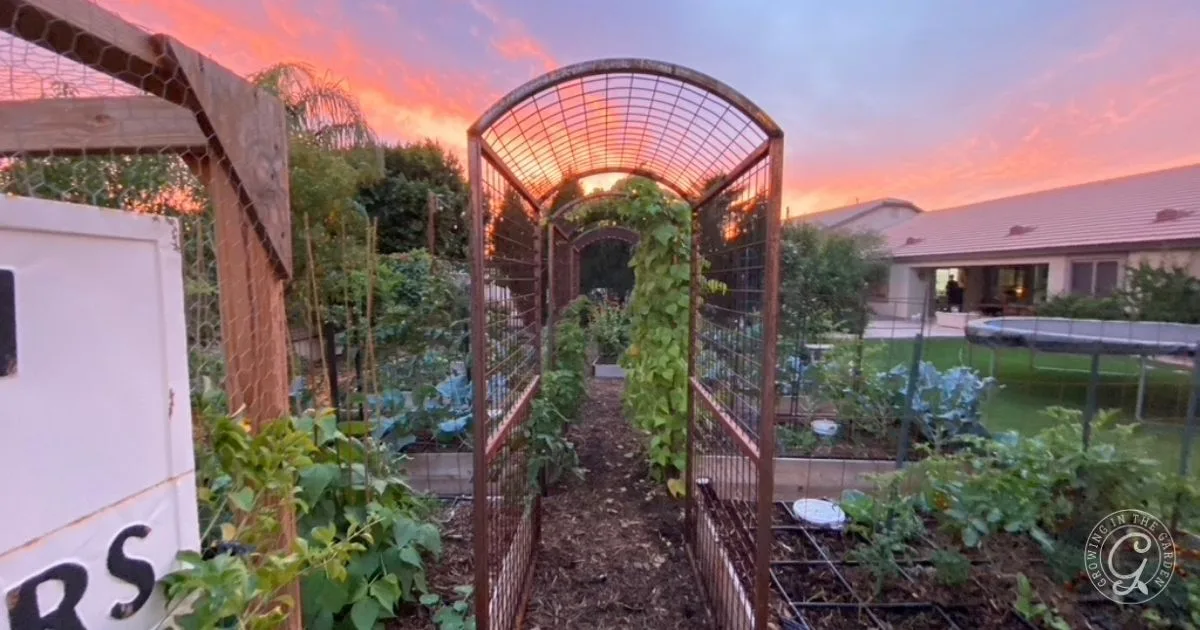
Placement: Position trellises on the north side of beds so they do not shade sun lovers. In very hot regions, a south-side trellis can filter light and shelter tender crops.
Structures to consider:
- Cattle panel arches between two beds for cucumbers, beans, and gourds.
- Flat or A-frame trellises for vining crops.
- A Freyer trellis for the middle or ends of beds.
You don’t have to start with expensive custom trellises; these inexpensive vertical gardening ideas are an easy way to add growing space to raised beds. Use my vertical gardening resources for ideas to implement vertical gardening in your space.
Height and anchoring: A 6 to 7-foot-tall trellis gives most vining crops room to climb. Anchor securely with posts or bed brackets so wind does not shift them.
Planting strategy: Put vertical growers behind compact crops. Train vines early to reduce tangles and keep fruit clean.
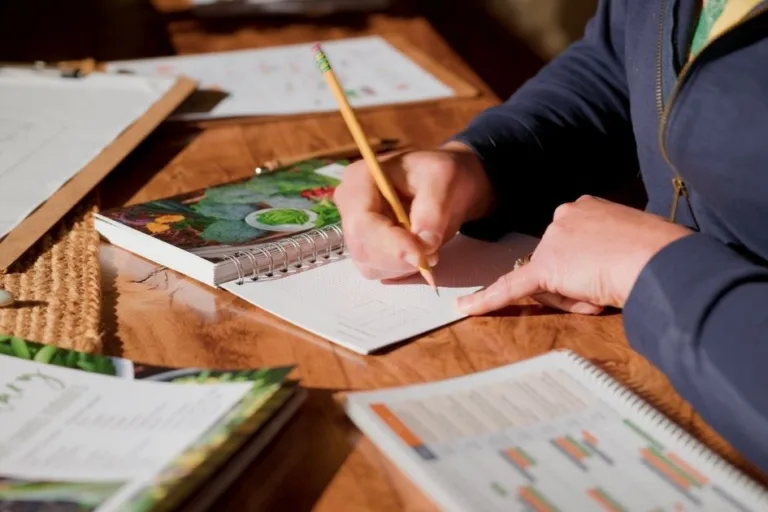
5. Plan Your Raised Bed Garden Design on Paper First
- Measure your space: Note fences, gates, utilities, and hose bibs. Mark sun paths and any shade from buildings or trees.
- Create a scale plan: Use graph paper or an online planner. Draw beds at scale and include trellises, gates, and water lines.
- Mock it up: Sometimes it helps to see it visually. Cut weed cloth to bed size and lay out the beds. Walk the paths with a wheelbarrow and a hose. Adjust until turns, hose routes, and trellis shadows work in real life.
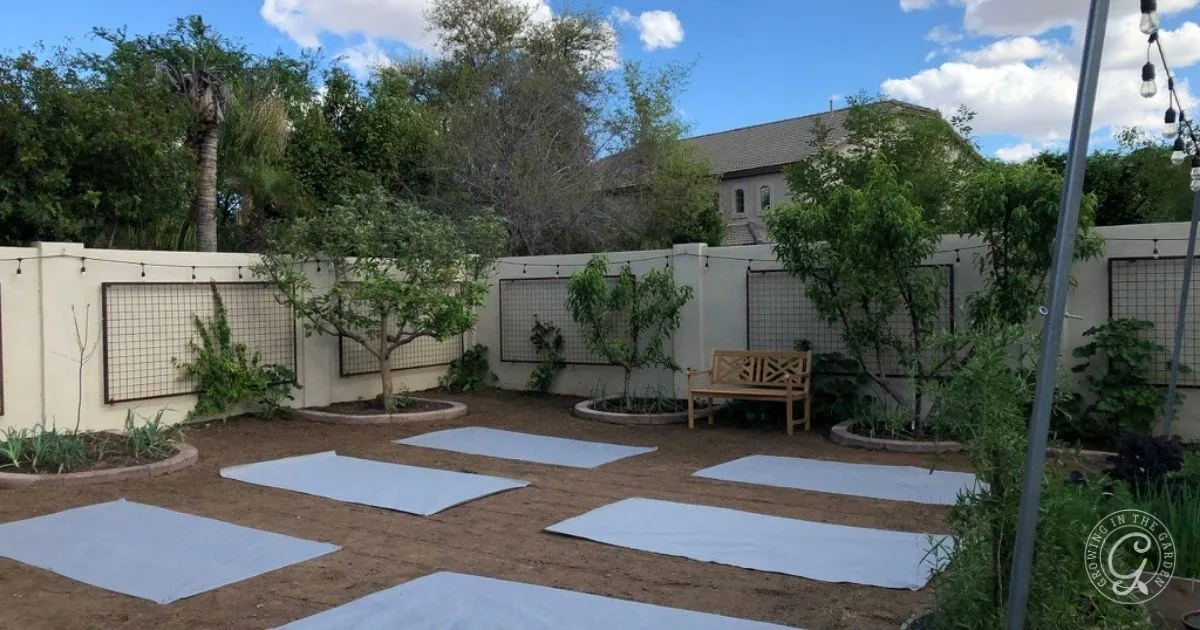
Learn More: See how a bed layout fits into an overall plan in Raised Bed Garden Design: Backyard Layout and Design Ideas
6. Choose Durable Raised Bed Materials
- Wood: Use untreated lumber. Cedar and redwood last longer than pine. Avoid railroad ties or treated timbers. Cap rails make comfortable seating and protect edges.
- Metal: Modern galvanized steel beds are durable, quick to assemble, and maintain clean lines. If you are curious about temperature, see my side-by-side testing.
Learn more: Do metal beds heat up more than wooden beds? - Masonry and block: Long-lasting and thermally stable. Heavier to install and less flexible for future changes.
Buy once, add over time: Start with the best beds you can afford and expand as budget allows.
I love the metal raised beds from Garden in Minutes.(Use code Angela10 to save $10 off $100 or ANGELA to save 7% on any size order.)
7. Place Beds, Run the Main Water Line, & Lock In Spacing Before You Add Soil
Level and square
- Set each bed level so irrigation distributes evenly.
- Check diagonals and adjust until the layout is square.
Lock in spacing
- Use cut boards or spacers to keep uniform gaps between beds.
- Confirm every path fits your wheelbarrow and any planned arches or trellises.
Ground prep
- Remove weeds and roots.
- In gopher or vole areas, add hardware cloth under beds before filling. Read this guide to learn how to get rid of gophers if you’ve spotted any in your yard.
- Skip solid plastic under beds. If you use fabric, reserve it for paths only unless Bermuda grass is present. For help keeping Bermuda grass out of your raised beds, please see this guide.
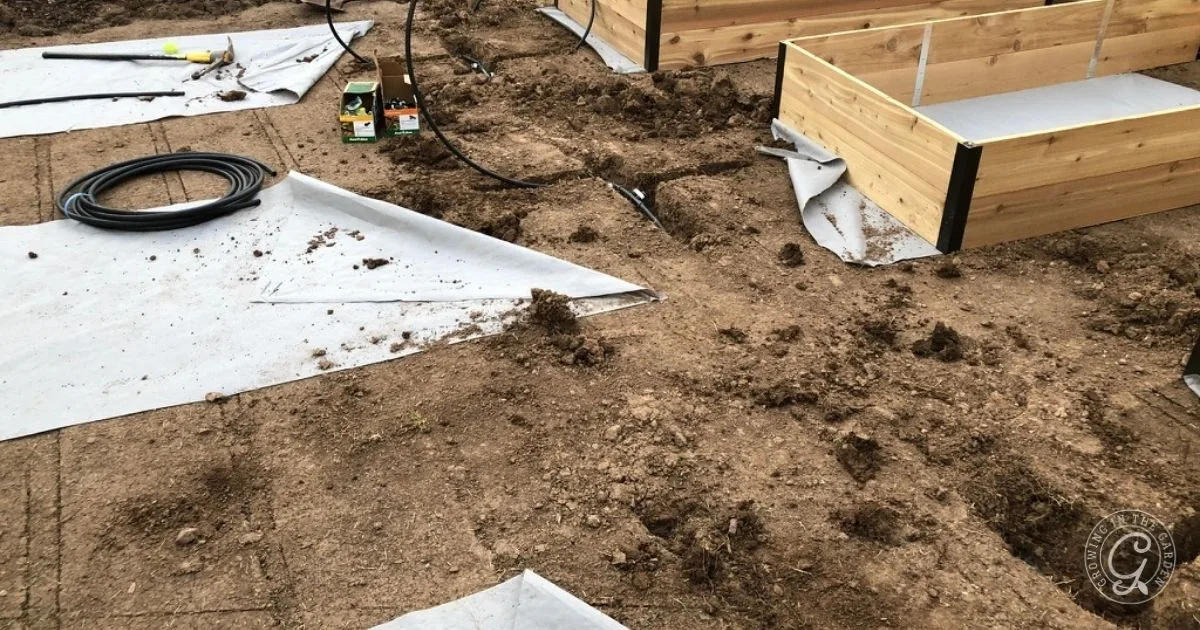
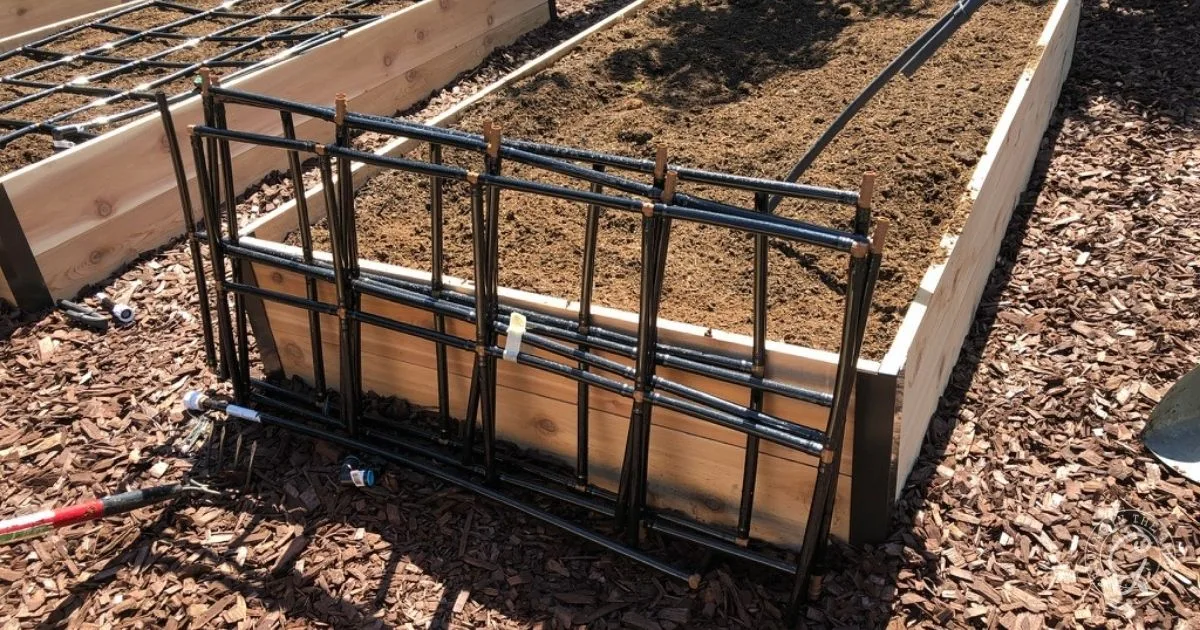
Lay out irrigation (do this before soil!)
- Mount the timer, filter, and pressure regulator near the spigot in a shaded, splash-free spot.
- Run a main line along the garden edge. Keep it straight, protected, and easy to reach.
- Install a manifold with individual shutoff valves so each bed can be controlled. Leave extra ports for future beds.
- If possible, sleeve under paths or gates with short runs of PVC so you can pull tubing later without digging.
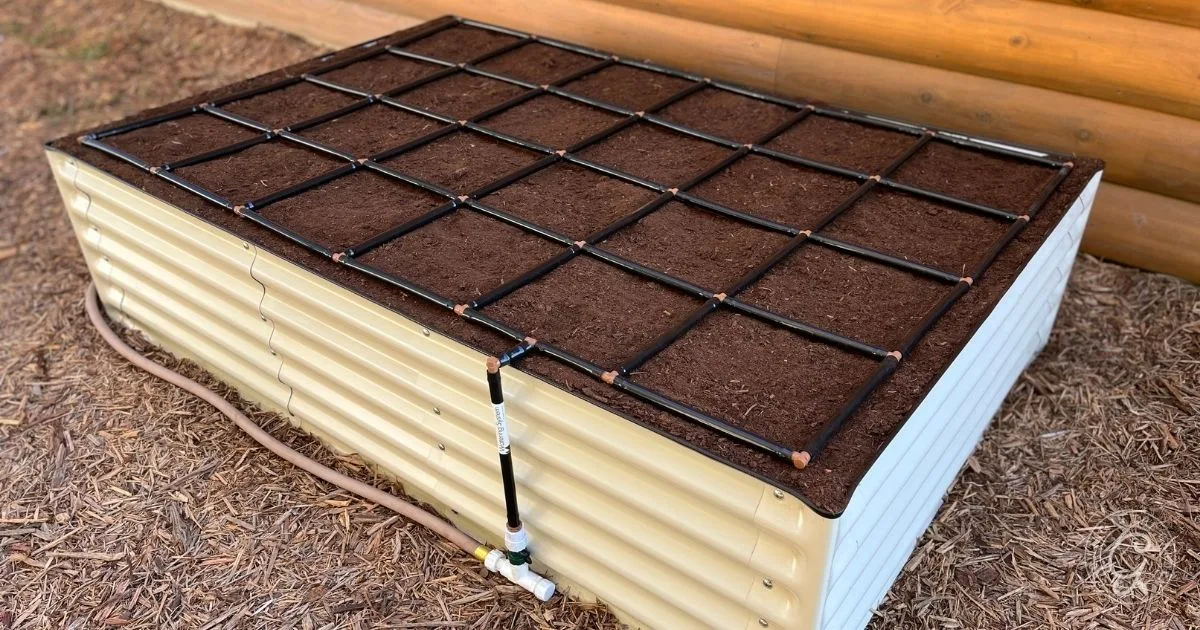
- Branch to each bed and bring a capped stub inside the frame. Install the in-bed grid or drip after the bed is filled.
- Add a flush cap at the end of each line.
Pressure test
- Pressurize the system, flush lines, and check for leaks before you add soil.
- Photograph the layout and measurements for your records.
8. Fill with the Best Soil for Raised Bed Gardens
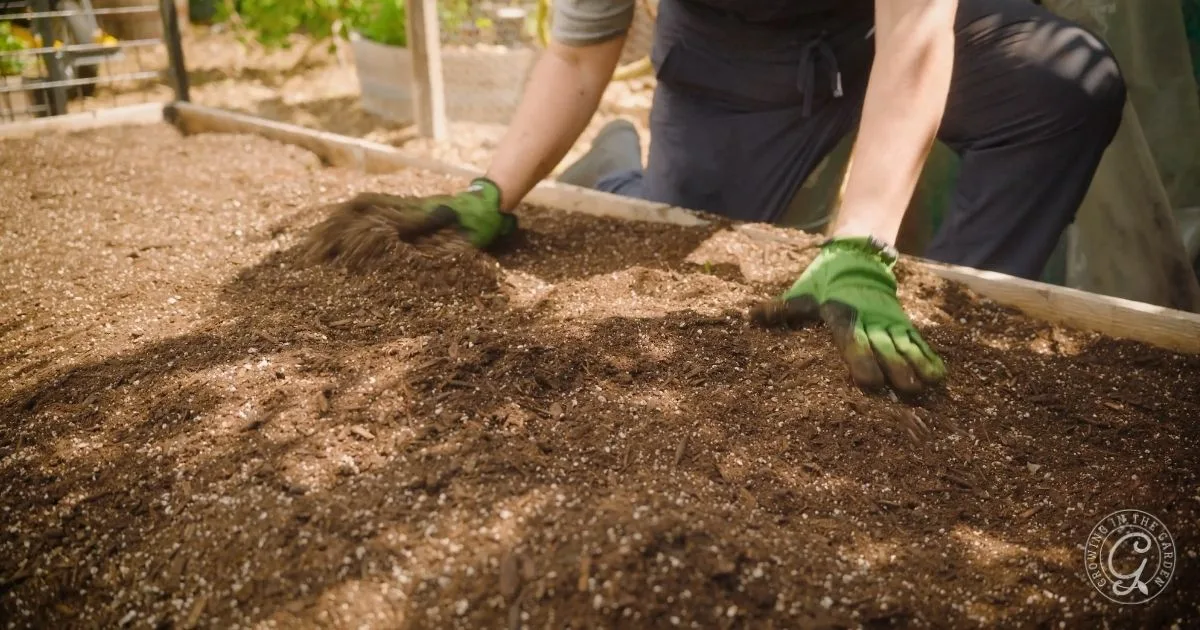
- Skip native soil: It is often too dense for raised beds.
- Proven blend: A mix of compost, coconut coir or peat, and vermiculite or pearlite creates a loose, moisture-retentive medium that drains well and supports root growth. I made my own perfect mix with Arizona Worm Farm if you want to take a look.
- Volume and settling: Use a soil calculator to estimate cubic feet. Fill nearly to the top, water in to settle, then top off. Expect a few inches of settling in the first weeks.
- Seasonal top-ups: Add compost and a thin layer of mulch each season to maintain depth and organic matter
Learn more: How to Fill Raised Garden Beds and get the full soil recipe in Best Soil for Raised Bed Vegetable Gardening
9. Install Irrigation Before You Plant
Build it once and water evenly from day one.
System options:
- A grid system that waters the entire surface uniformly is simple to use and great for dense plantings.
- Traditional drip with emitters or dripline works well for rows and perennials.
My setup: I use Garden in Minutes Garden Grids in all my beds. They install quickly, water evenly, and flip up out of the way to make seasonal changes simple. (Use code Angela10 to save $10 off $100 or ANGELA to save 7% on any size order.)
Learn more: How to Water Your Garden and The Best Way to Water Raised Bed Gardens.
10. Plant with the Mature Size in Mind

- Sun map: Plant the tallest crops on the north side so they do not shade shorter plants. Reserve the sunnier beds for fruiting crops and the slightly shadier beds for greens and herbs.
- Growth habit: Place vertical growers near trellises. Let sprawling plants cascade over bed edges to keep paths clear.
- Bed roles: Dedicate one bed to perennials or long-season crops. Keep others for annual rotations. Grouping crops by spacing needs simplifies irrigation and harvesting.
- Local timing: Use a regional planting calendar so crops go in during the right window. In hot climates, plan to add shade as needed. Live in the low desert? These are the guides I recommend.
Learn more: How to Add Shade to Your Garden, Plant Spacing in Square Foot Gardens.
See My Full Backyard Layout
Want to see how all of this comes together in a real yard, including bed dimensions, path materials, zones, and sun strategy? Read Raised Bed Garden Design: Backyard Layout and Design Ideas
If you’re ready to get started on your own raised bed garden, let me walk you through it step by step in my course 30 Days to Your First Desert Garden.
FAQ: Raised Bed Garden Design
Four feet wide or less so you never step on the soil. Beds against a wall or fence should be 2 feet or less. This prevents compaction and keeps maintenance simple.
Plan for 3 to 4-foot paths. You will appreciate the space for a wheelbarrow, hoses, and plants that spill over the edges.
Most crops thrive in 12 to 24 inches of soil. Root crops and tomatoes appreciate the deeper end of that range.
Put trellises on the north side to avoid shading sun lovers. In hot regions, a south-side trellis can filter light for tender crops.
A grid or drip system that waters evenly across the bed is ideal. I use Garden in Minutes Garden Grids. Use code Angela10 to save $10 off $100 or ANGELA to save 7% on any size order.
Both can work well. Wood is classic and workable. Metal beds are durable and quick to assemble. If you are concerned about temperature, see my testing on if metal beds heat up more than wooden beds.


Where do you purchase your landscape fabric come from?
White shown in photos of your garden appears much thicker than what I can purchase locally, which does not stop anything from coming through.
It also appears in one photo that you have covered the entire area with that fabric after bed placement in an area where you had Bermuda.
Thank you.
I got mine from Home Depot. Here’s a link to the one I used: https://www.homedepot.com/p/Vigoro-4-ft-x-50-ft-Heavy-Duty-Matrix-Grid-Landscape-Fabric-VPNM45085/302801107
Hello! I haven’t been able to find anything on your site about raised bed liners. If I am using a pressure treated would to make my beds, is a liner necessary?
It’s generally not recommended to use pressure treated wood for garden beds. If you are using it, I would use a liner.
Hi Angela, just getting started with raised beds. We live in Cave Creek and have to have the garden fully enclosed to keep the critters out. I noticed you have bark or mulch between your beds as pathways. Can you tell me why you use this material and have you tried gravel or other materials with less success?
Thanks,
Marry
Hi Marry. I did have rock between my beds at one point and felt like it heated up the garden more. I have the wood chips quite deep so my beds are buried a few inches in them for insulation. Gravel could work too, it is personal preference.
I was wondering if you could tell us what online planning tool you used to do your plans?
Hello. I’m planning the placement of my four 4×8 Garden in Minutes metal raised beds. I’m in zone 9a also in AZ. Does it matter if I orient the beds so the long size faces south or the short end faces south? This will be my main vegetable garden. Thank you for your invaluable website.
Typically beds are positioned with the short side facing south. Best of luck with your garden. I hope you like those beds as much as I do!
Thanks for the great info! Can you explain the difference between choosing a quality wood material, like those cedar boxes, versus metal ones? I’m unsure what the different pros/cons are. Thanks! Also, can you explain what differences you’ve seen with using deeper boxes rather than the size Mel recommends (in SFG)? I trust your experience, I just wanted to get an idea before I have to spend extra on bigger boxes and more soil. Thank you!
Good question. I’m planning on doing a blog post with more information about the differences between wood and metal beds. I use both and like both. It may depend on where you live for the soil depth. My climate is very hot and dry and the extra depth helps regulate temperature better and retain more moisture.
Do you use landscaping fabric under your raised beds? I want to be as weed free as I can be.
I used landscaping fabric under my beds in areas with Bermuda grass. A thick layer of woodchip mulch helps to keep most weeds down.
In section #4, first picture – where did you get those wooden arched trellis’ from?
A local welder, Two Brothers Metalworks made them for me.
Hi Angela. Can you tell me about the buckets you have buried in some of your beds? Are they meant to release liquid fertilizer? If so, how many holes per bucket and how many per bed do you recommend? Thank you!
They are vermicomposting bins, here is an article with more information: https://growinginthegarden.com/vermicomposting-made-easy-in-bed-worm-composting/
Did you till the ground below your beds? Our clay soil is so hard I worry about plants with deeper roots not being able to penetrate it under the beds.
No, I don’t. The soil on top will begin the process of loosening up the clay.
Hi Angela, it is Lillian again..
i am first time gardener (2021)!
My garden is small and the only “sunny” part is close to my neighbour’s tree by the fence and i did see some tree roots 6 inches below the ground when i first worked on the soil (without knowing the no dig gardening) but my swiss chards were still thriving.
i am going to redo my bed (with cedar, not treated wood), do you recommend me putting weed under the bed to prevent tree roots coming up onto the bed? or should i just leave it and take the benefit of having worms into the bed?
i saw the difference in growing in the beds vs container gardening, the plants were doing better than in containers, hence i would like to keep that one bed i have
thanks
do you use weed cloth in your garden bed? if so, does it hinder worms in and out of the soil?
I used weed-cloth below my beds that I put over Bermuda grass, but not in other areas. It would block the worms in the locations where it is used.
Hi Angela it’s Barry again, i forgot to mention in my last comment, that i fill my beds with Compost, Cocoa Coir and Perlite. I don’t use any Peat in my beds so i use the Coir as a replacement, and the Perlite i use as i live in England and as you know it’s always raining over here, well not 24/7 everyday but it does rain, and the Perlite is better in rainy areas as it keeps the water in, and releases it when it’s dry and also airates the Compost as well, plus at the moment we are having an Indian Summer, unusual weather we are having over here at the moment with Flash Floods, Thunder and Lightening and now this Indian Summer. Stay Safe.
Hi Angela i am from England and due to my health i managed to build two raised beds that are 6ft long, 3ft wide and 22 inches deep.
These were made from 6×2 Pressure Treated timber which after 2010 were fine to use, as there were bad chemicals in the wood before then, but plenty of veg growers say it’s ok to use now.
I presume it’s what suits you best and cost really, plus i always line my Raised Beds always have done, always will.
Stay Safe over there.
Barry.
Hi Barry – Thanks for commenting. Love hearing what you are doing in your garden. Thanks for sharing and happy gardening!
What is your opinion of using metal troughs for garden beds?
I think they are a good option. I like the ones with no bottom – otherwise I think drainage could be an issue – even if you drill holes.
Hi Angela,thank you for the valuable advice and tips on home gardening. You are truly an inspiration.
I’m ordering the 15″ high cedar garden beds from Gardeners Supply and would like to apply some natural protection to the boards. I would appreciate your opinion on Gardeners Supply’s Cedar Garden Bed Oil.
I have another question, I live in Southern California, planting zone 10a. What’s your planting zone in Mesa, AZ?
Thank you in advance for getting back to me on the above.
Thank you. I haven’t used the oil, but it seems like a good option. I trust and have been happy with the garden bed products I’ve used from Gardeners. My planting zone is 9b – but our extreme heat in the summers makes our planting dates different from a lot of zone 9b climates.
This is my first time trying to grow a garden in Arizona. My backyard is on the North side of my house, if I have my raised bed along the patio on the west side will an indirect sun spot work? It would still get the light just not the sun beating down on it directly (I am worried about my first garden not surviving because of it)
Don’t be afraid of the sun. Plants do best with sunlight. You can always provide some shade with shade cloth during the hottest times of the year, but most plants need 6-8 hours of sunlight to grow well. Make sure your beds are deep enough (at least 12 inches) and you fill them with good soil.
Did you seal the wood before planting? Or line it with plastic?
I used a whey based sealer on some of my beds before planting. No I don’t line it with plastic.
Angela,
Just found your site. I live in SW Fl. ( Ft. Myers- Zone 9 B) so I’m hoping your growing tips suit my area. I love your heavy Duty trellises and arches. Where can I order them or did you make them?
Excited to watch more videos Mara Clark
Hi. So glad it’s helpful. The heavy duty trellises are from twobrothersmetalworks.com If you find a welder locally they may be able to make one for you.
I want to start a vegetable garden, my backyard is all paver’s, no dirt. I live in Arizona and I am new to gardening. Will you please walk me through the first steps to getting started? Thank you for your help.
Hi Jessica, I’m glad to hear you want to start a garden. There is an article on my website “How to Start a Garden in 8 Simple Steps” that you may find helpful as you get it started. Here’s a link: https://growinginthegarden.com/gardening-for-beginners-how-to-start-a-garden-in-8-simple-steps/ You can also look under the getting started tab. There are a lot of articles there too.
Love this! What are the dimensions of yours?
Most of these beds are 15 inches tall, 4 feet wide and 8 feet long.
Hi Angela – I have been wandering your site all weekend. Excited to start my garden in Phoenix! Thanks for all the helpful tips. Yesterday, I was served your amazon purchase list, but can’t seem to find it again. Can you link your Amazon lists for me?
Yay! Best of luck with your garden. Here’s a link to my Amazon Favorites: https://www.amazon.com/shop/growinginthegarden You can also click on the “Amazon Favorites” link in the sidebar
Thanks so much. Glad it was helpful.