Fava Beans: Cover Crop & Edible Harvest
Fava beans, or broad beans, are near the top of my favorite cool-season crops list. I love the harvests, and the plants are a source of organic material for my garden at the end of the season. Over the years, I’ve learned a few tips and tricks for growing fava beans in my warm climate, and I’m happy to share them with you.
Key Takeaways: Fava Beans
- Fava beans, also known as broad beans, are great for warm climates due to their heat tolerance and long harvest window.
- You can plant fava beans in fall for winter-into-spring crops or early spring in cooler zones.
- They enrich the soil with nitrogen, and you can grow them as a cover crop or for delicious beans.
- Fava beans require well-draining soil, consistent moisture, and support as they can grow tall.
- They offer health benefits, including being a good source of protein, fiber, and essential nutrients.
Article Index:

Why Grow Fava Beans?
- Heat and Frost Tolerance: Fava beans (especially the ‘Vroma’ variety) can handle mild frosts and perform well even when temperatures begin to climb.
- Long Harvest Window: A single planting can yield beans for many weeks.
- Cover Crop Benefits: When temperatures soar and plants stop producing, chop them down and drop them in place as a “green mulch.” Top with compost, and plant your next crop immediately. The spent fava plants break down quickly in warm weather, adding valuable organic matter to the soil.
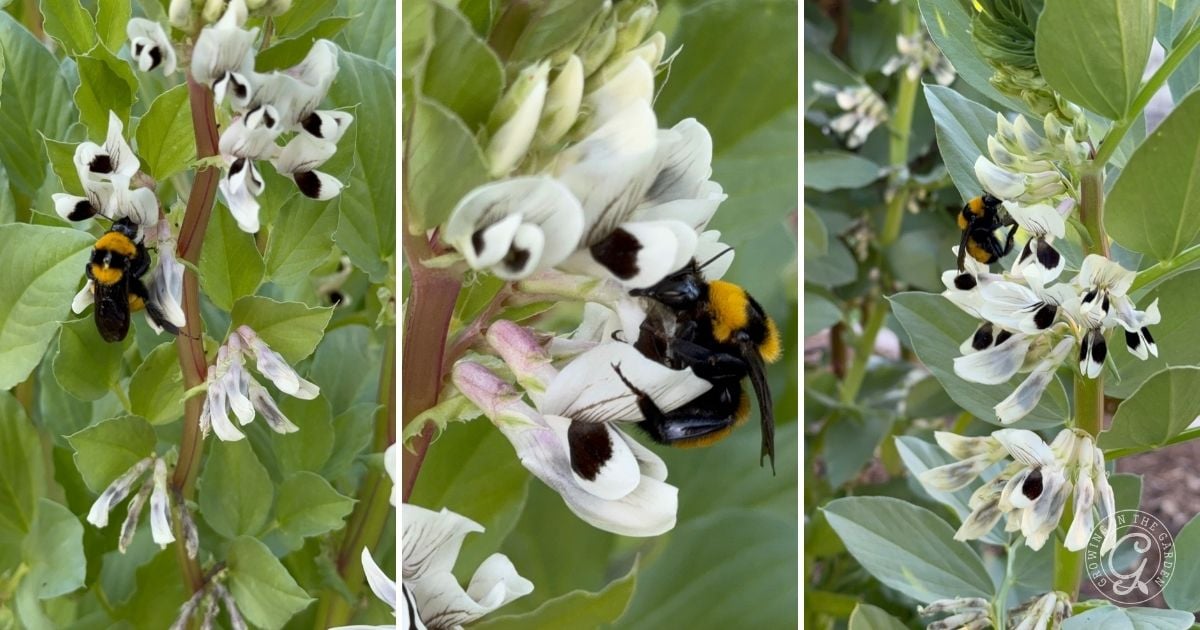
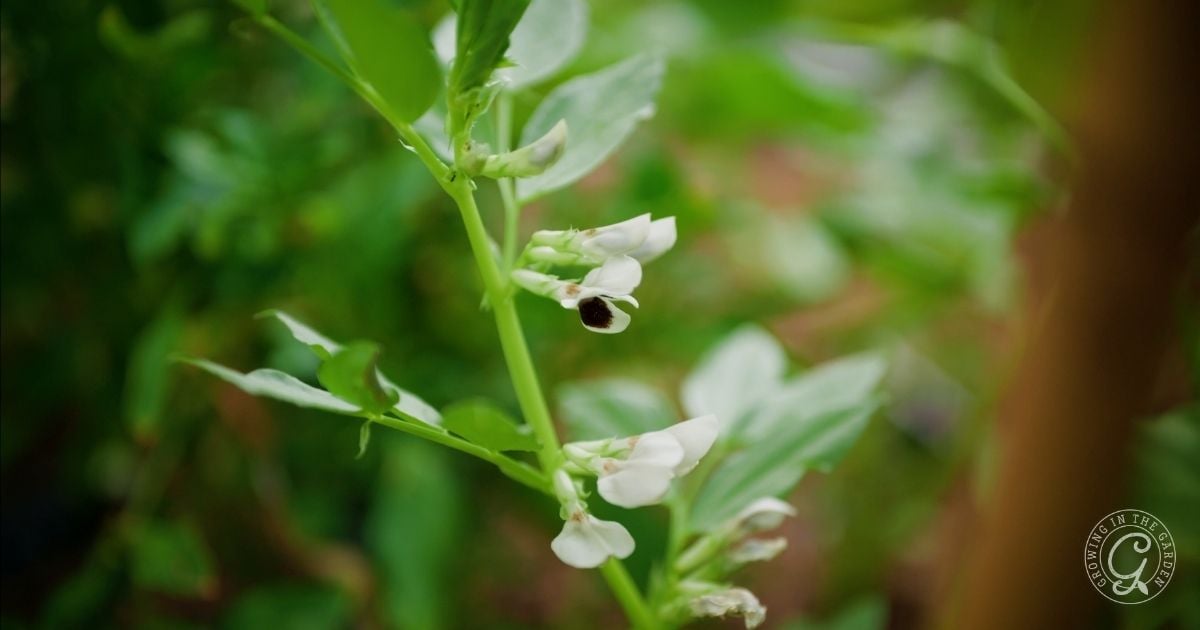
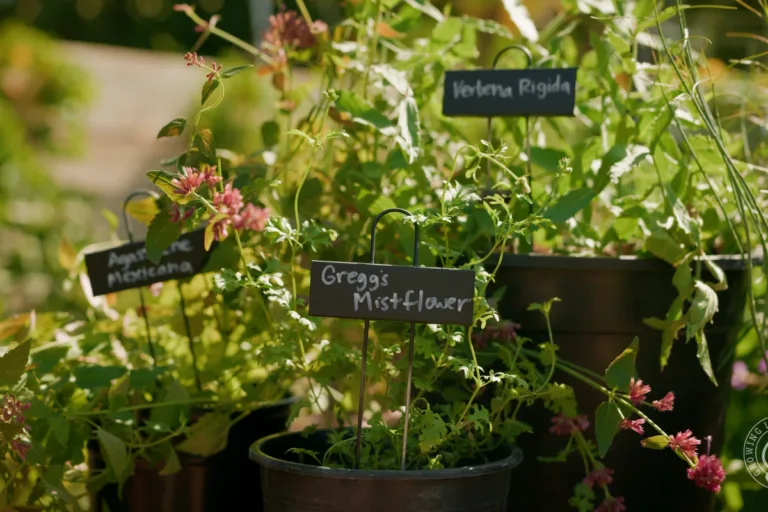
- Early Blossoms for Pollinators: Fava beans bloom early in the season—often in January—which helps feed local pollinators when other flowers aren’t available.
Fava beans do double duty as a food crop and soil builder. See why I included them on my list of top fall vegetables for mild-winter gardeners.
When to Plant Fava Beans
In cooler or cold winter zones, start them in early spring as soon as the ground can be worked. In mild-winter climates, sow them in fall for a winter-into-spring crop.
Here in the low desert, I like to plant in October. You can plant from October through January, but remember, the later you plant, the shorter the harvest window. Planting in fall allows the beans to grow during cooler months and keep producing until it gets hot.
Once the cool season ends, switch from fava beans to a warm-season crop like lima beans. Learn how to grow lima beans for a summer harvest that stores well.
Seeds or Transplants
I’ve had equal success starting favas from seeds and transplants—they tolerate transplant shock better than many legumes.
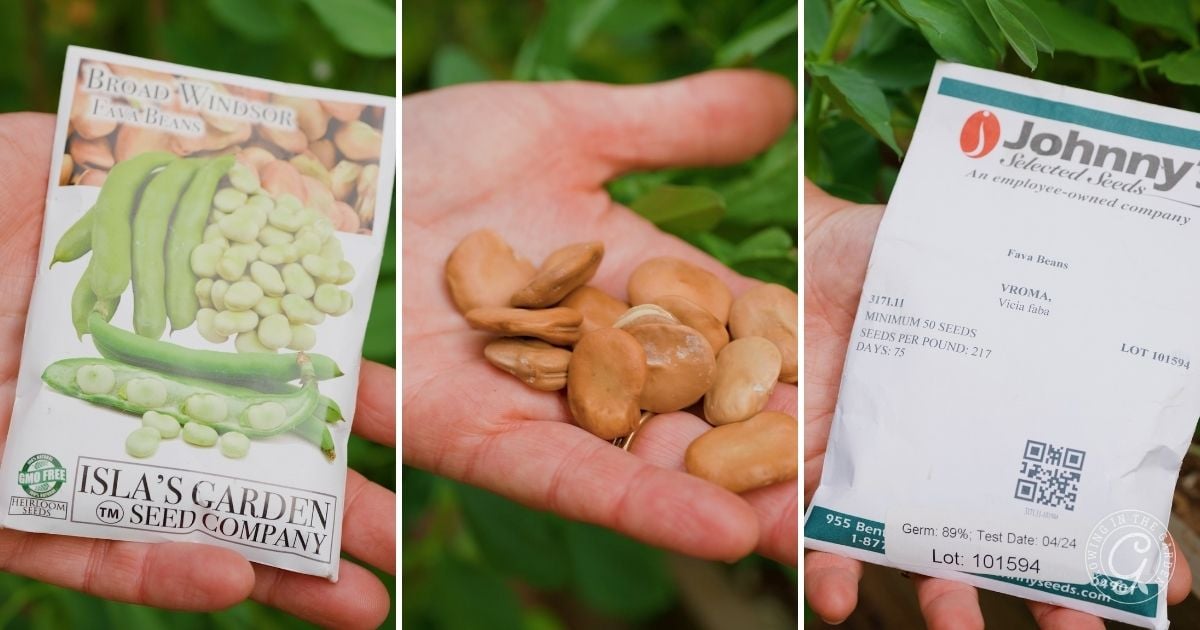
My favorite for warm, short-day winters is Vroma, whose blooms aren’t triggered by day length, while the classic Broad Windsor remains the most widely grown variety.
Fava beans do best in loamy, well-draining soil—they’ll tolerate heavier soils if they drain reasonably well, but avoid waterlogged spots.
- Boost Nitrogen Fixing: To supercharge nitrogen uptake, treat your seeds with a legume inoculant. These products contain Rhizobium bacteria that colonize bean roots and form extra nodules, which pull more nitrogen from the air into your soil. This is the one I use on Amazon.
Quick note: I mixed these up before—Rhizobium bacteria fix nitrogen for legumes, while mycorrhizal fungi help with water and nutrient uptake but don’t fix nitrogen
- Soil Prep: Amend the bed with a generous layer of compost and a handful of worm castings before planting.
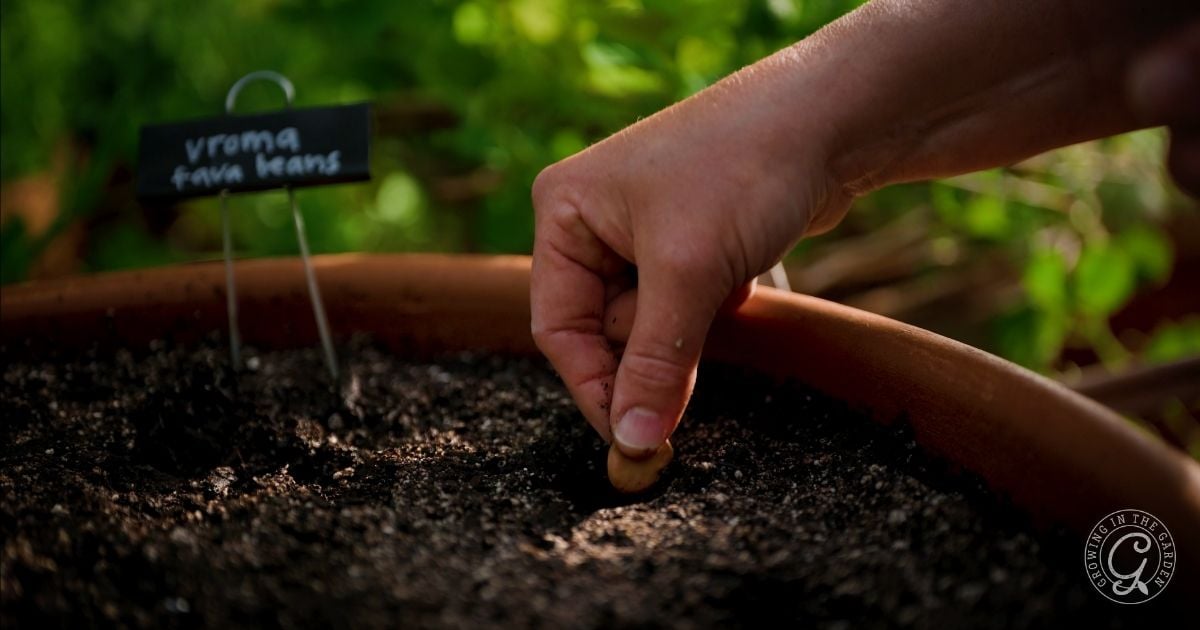
- Spacing: Sow four fava beans per square foot—about 8 inches (20 cm) apart—whether you’re using square-foot gardening or traditional rows.
- Depth: Plant seeds 1–2 inches (2.5–5 cm) deep.
- Moisture: Keep soil consistently moist (not waterlogged) until seedlings emerge.
- Thinning: If direct-sown seedlings sprout too close together, thin them back so each plant has about 8 inches (20 cm) of space to grow.
With these steps—especially adding an inoculant—you’ll maximize both healthy plant growth and the nitrogen-fixing benefits fava beans bring to your garden.
Caring for Fava Beans
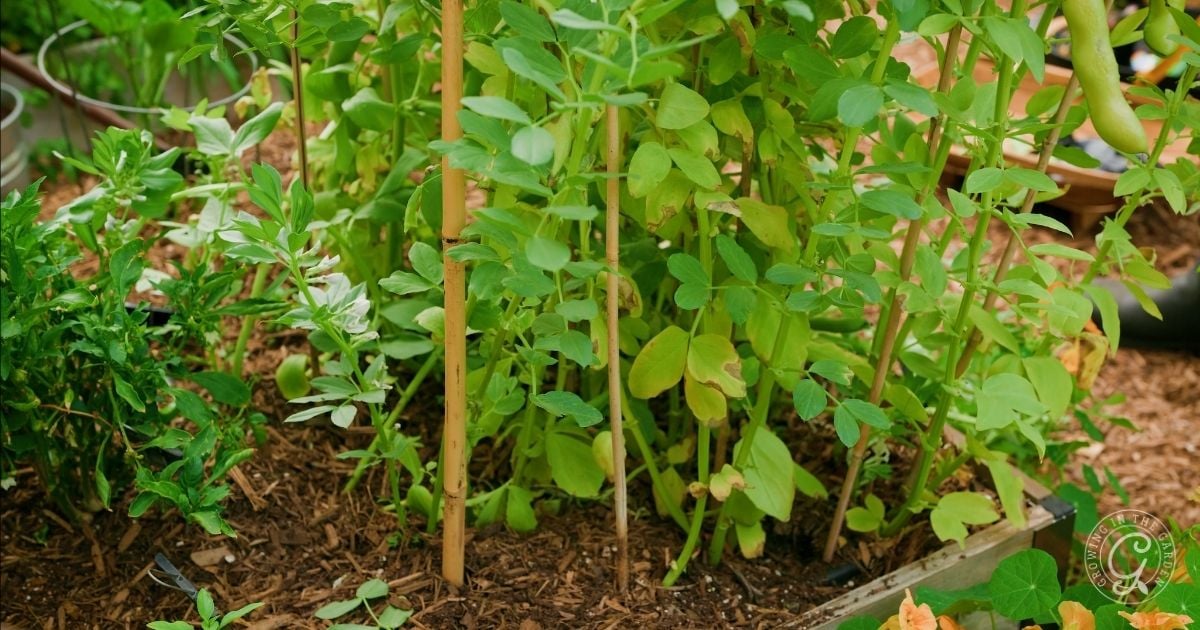
Support and Staking
Fava bean plants can grow tall and top-heavy, especially when loaded with pods. They often flop over, so be ready with:
- Individual Stakes: I put a bamboo stake next to each stem and clip it in place.
- Corralling Method: Drive stakes at the corners of your bed and run two tiers of string around the plants to keep them upright.
Choose whichever method is easiest—this simple support will prevent plants from bending or breaking under their own weight.
Watering Needs
Check your soil. Cooler temperatures will mean less watering, but as temperatures climb, or in the fall when it’s still warm you may need to water more often. A layer of mulch helps to keep the moisture in the soil.
Pinching Tops for Better Pods
Once the main stem is loaded with flowers, pinch out the top few inches. This encourages larger pods and can help reduce aphid attacks at the plant’s tender tips.
Pests and Diseases
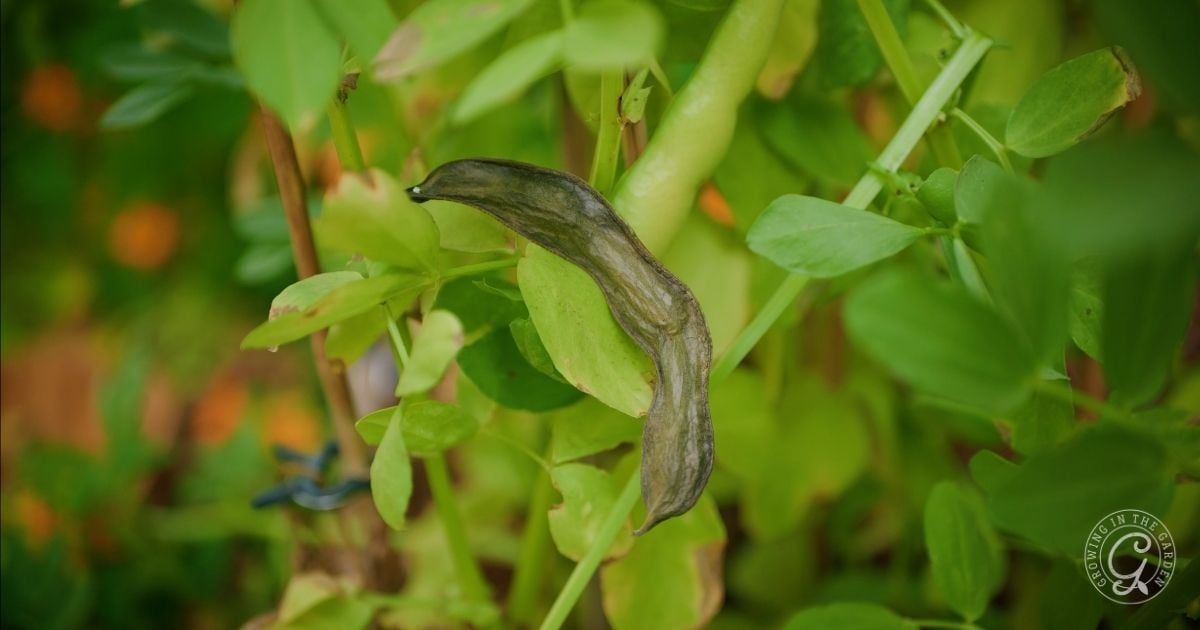
Fava beans are generally resilient to pests and diseases in cooler weather. As temperatures climb, you might spot a few aphids—luckily, ladybugs and lacewings will gobble keep them in check. When it gets hot (above 80°F/27°C), you may notice occasional blackening or spotting on leaves and pods, usually from an aphid-transmitted virus. That’s your cue that the fava season is winding down.
Learn more about using beneficial insects as pest control in this guide.
Other Problems: Diseases like chocolate spot fungus or rust can occur in very damp conditions, so ensure good airflow by not overcrowding plants. Favas are resilient, especially if planted in well-draining soil and mild temperatures.

Harvesting and Using Fava Beans
Fava beans typically reach maturity around 75–90 days from direct sowing.
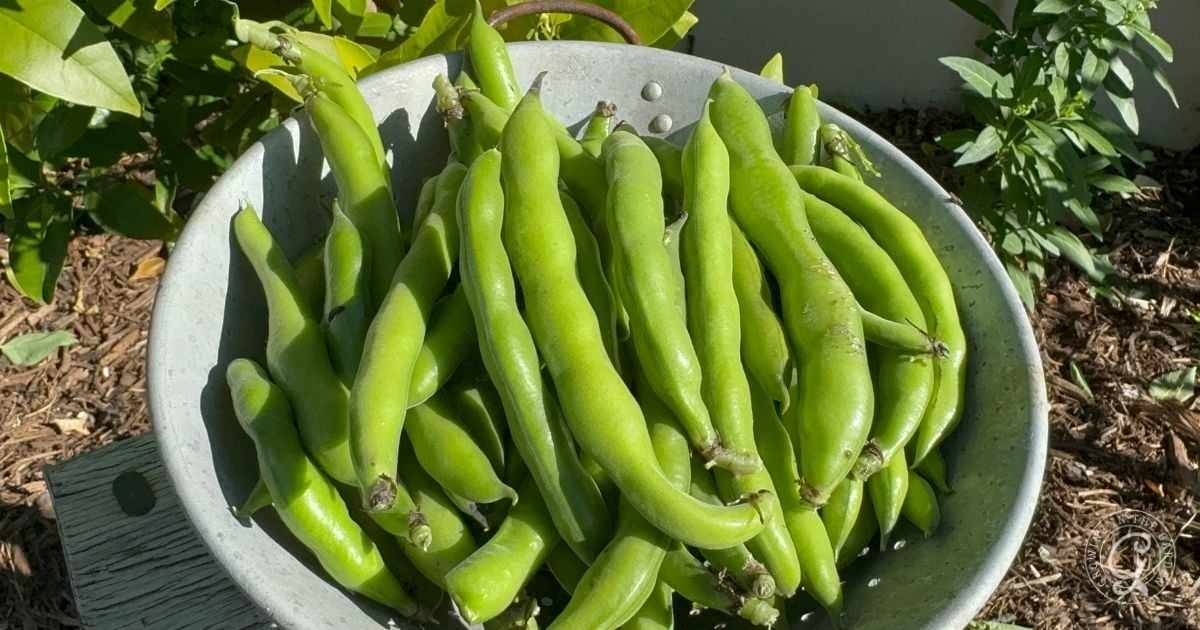
When to Harvest
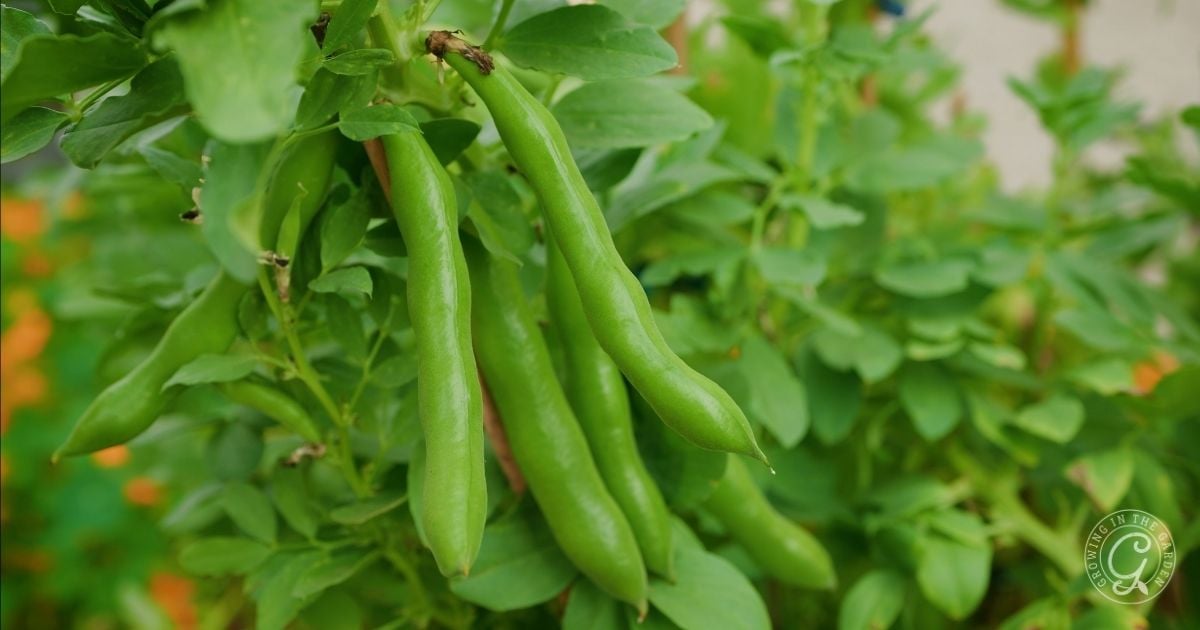
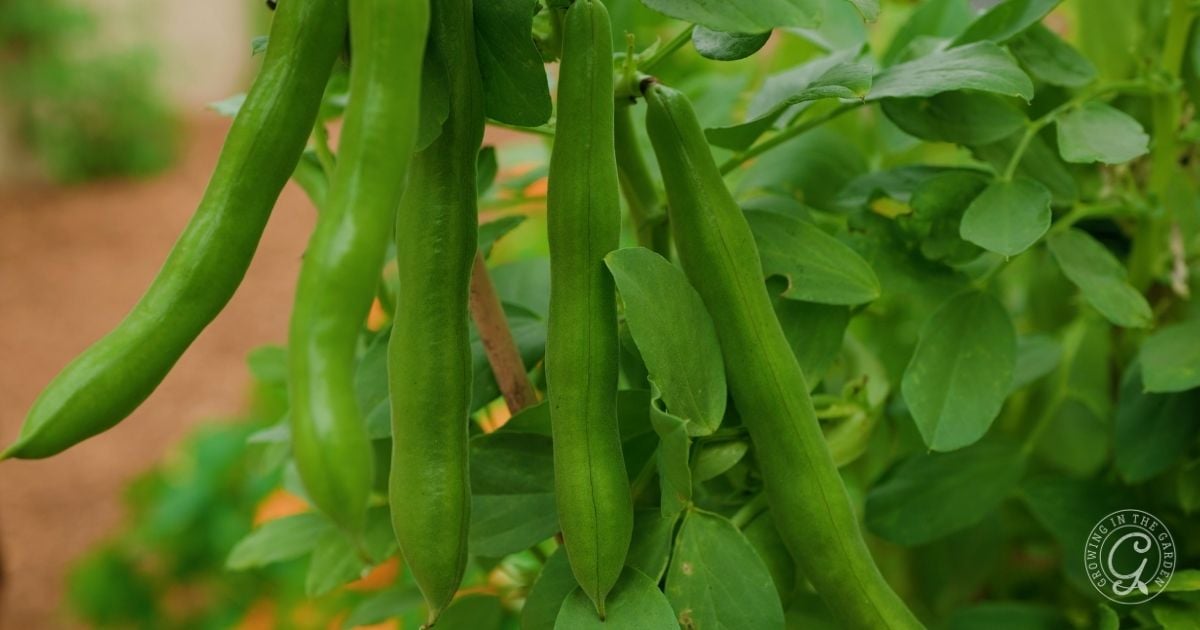
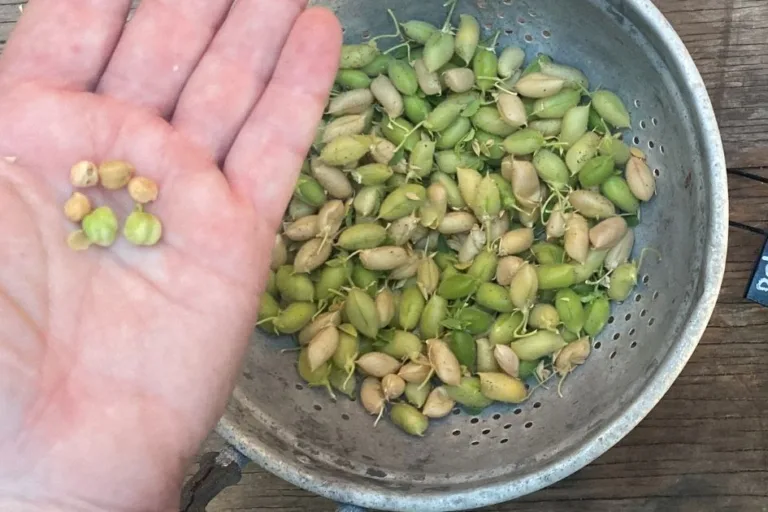
- Young Pods: Many gardeners prefer to harvest pods at “finger size,” when they can be eaten whole. They’re tender, sweet, and delicious.
- Mid-Size Pods: At this stage, you can shell the beans, briefly blanch them, and slip off their outer skins for a creamy texture.
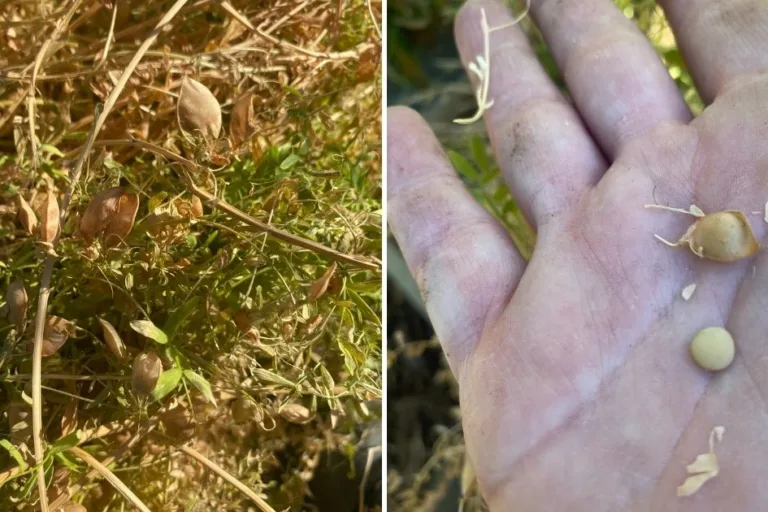
- Dry Beans: Leave pods on the plant until they turn dark brown. Shell them for long-term storage, remembering to soak the beans overnight before cooking.
Harvesting Tips
Pods grow in pairs along the stem. To pick them without damaging the plant, clip them off with hand pruners or try this method:
- Gently push the pod downward toward the main stem.
- Snap it off in a single smooth motion (it’s often easiest to harvest two pods at a time if they’re growing next to each other).
Fava beans taste best right off the plant and can be kept in the fridge for only a few days before losing flavor and texture. If you plan to shell and freeze them, do so promptly for maximum freshness.
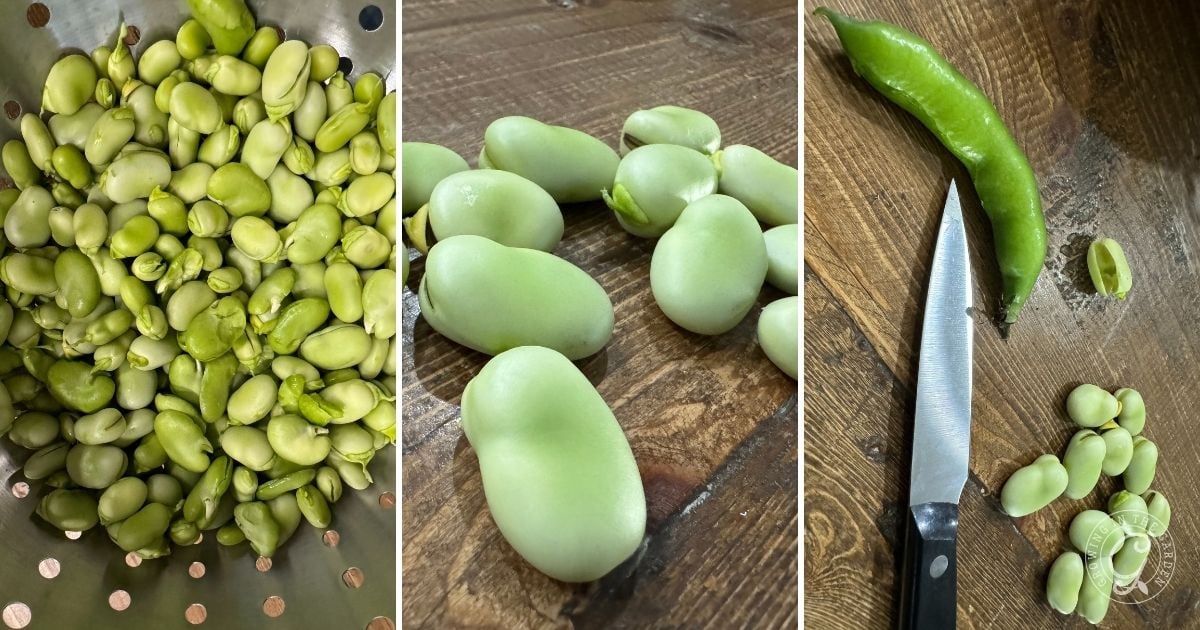
How to Prepare
Experiment with different stages and cooking methods to find your favorite flavor and texture.
- Young, tender pods can be snapped and eaten raw (if you enjoy that mild “green” flavor) or steamed quickly.
- Once shelled and skinned, mid-sized beans are lovely sautéed with garlic or onions.
- Mashed or pureed favas make a tasty dip similar to hummus.
Edamame beans offer another delicious garden option—check out my tips for growing edamame successfully at home.
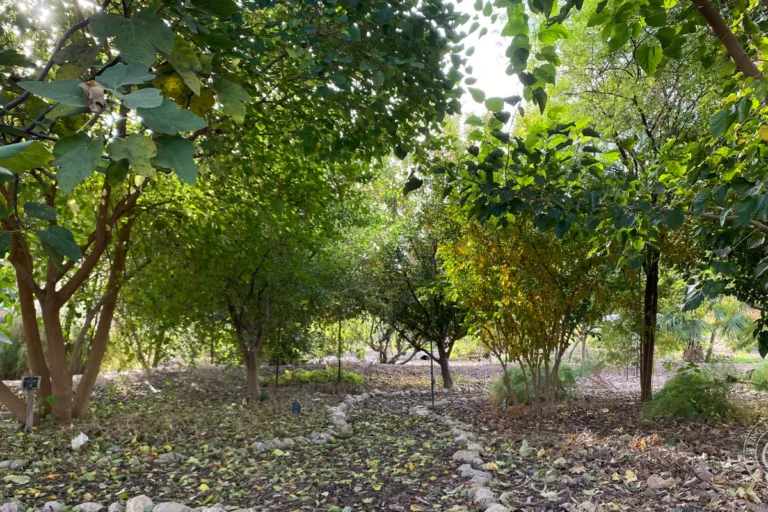
Chop-and-Drop Cover Crop (with or without a Harvest)
One of the best things about fava beans is how you can tailor them to your garden goals:
- Peak Nitrogen Production (No Harvest): If you’re looking purely for a quick, high-nitrogen cover crop, sow favas and let them grow until they start to form buds, but before the pods develop. At that point, cut the plants at ground level and leave the roots in place. Those living roots are hopefully packed with nodules full of atmospheric nitrogen, which will feed your soil as they break down.
- Cover Crop + Tasty Harvest: If you want both organic matter and fresh beans, let your plants flower and set pods, then chop—and still leave the roots! You’ll enjoy a harvest of beans, and when production slows, cut the stalks at the soil surface.
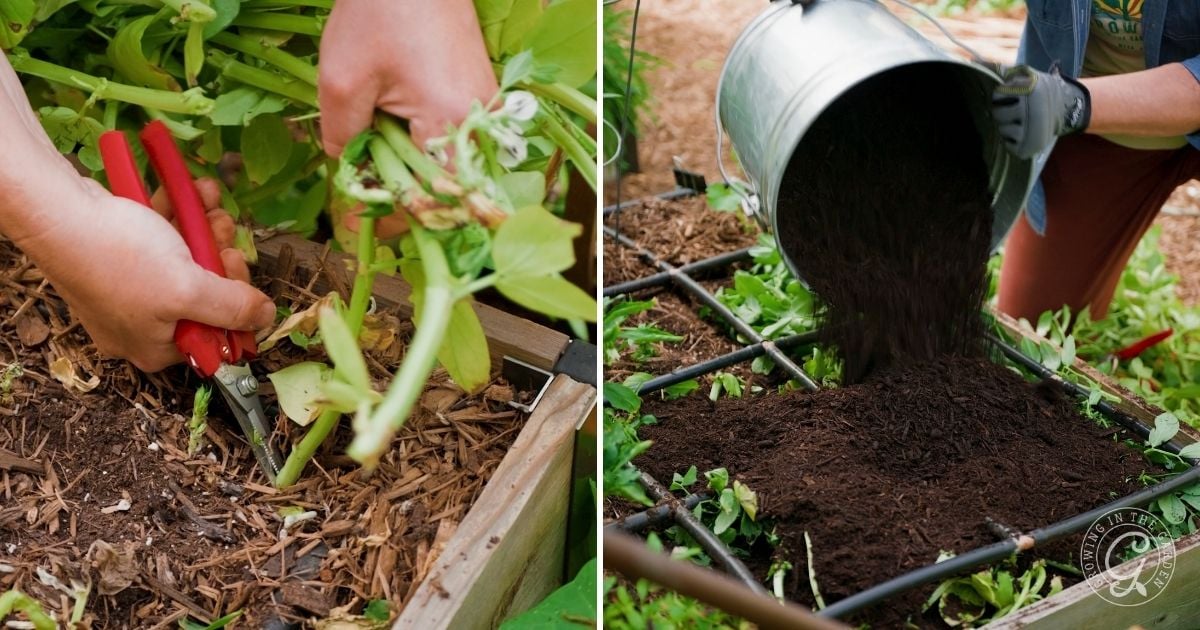
How I Do It in My Garden:
- Cut back at the right time: Decide whether you’re after nitrogen only (chop at bud stage) or both beans and nitrogen (chop after you’ve harvested pods).
- Chop at Ground Level: Use garden shears to cut the plants right at the soil line, leaving the roots undisturbed.
- Spread and Plant: Chop the stalks and scatter them evenly over the bed. Top with a thin layer of compost, then let them break down or if you’re impatient like me, go ahead and plant your next crop—zinnias, summer veggies, or whatever you like.
- Watch It Work: In warm weather, the fava residue breaks down rapidly, enriching your soil with organic matter and nitrogen.
If you’re looking for cover crops that stand up to high temperatures, check out my guide on Heat-Tolerant Cover Crops for Summer Gardens to discover options that thrive when it gets hot.
Saving Seeds
If you like the variety you grew, saving seeds is easy:
- Allow some pods to fully mature and turn dark brown on the plant.
- Harvest the pods and let them dry thoroughly.
- Shell the beans and store them in a cool, dry place.
- Next season (or whenever you’re ready), plant these saved beans for a repeat performance.
Learn more about how to save seeds in this guide.
Health Benefits of Fava Beans
Fava beans aren’t just great for the garden—they’re great for you, too! Here are a few reasons to include them in your meals:
- Rich in Protein: Favas provide a good plant-based protein source, making them a favorite among vegetarians and vegans.
- High in Fiber: They’re known to support digestion and help keep you feeling full longer.
- Packed with Vitamins and Minerals: Favas contain folate, iron, manganese, and other essential nutrients that support overall health.
- Potential Heart Health Perks: Like many legumes, they may help maintain healthy cholesterol levels when included in a balanced diet.
Always remember to consult with a healthcare professional if you have any dietary concerns, especially if you have conditions like G6PD deficiency, as fava beans can pose risks in certain cases.
Fava Bean FAQs
A: Absolutely. Choose a deep container (at least 12–18 inches) to accommodate their root system, and provide adequate support as the plants grow tall.
A: Yes. Fava beans are legumes, which means they have nitrogen-fixing nodules on their roots. They add nitrogen to the soil—especially if you chop and drop them before they produce beans.
A: Sometimes it takes a bit of time for pods to form after flowering. Cooler temperatures and plenty of pollinators help. If temperatures spike, flowering can stall, so a little patience is key.
A: In cooler months, they don’t need frequent watering. As it warms up, keep an eye on the soil moisture and water when the top inch starts to dry out. Avoid waterlogged conditions, though.
A: This is a matter of taste. Larger beans can have a tougher outer skin that some people prefer to remove after blanching. Younger beans are often tender enough to eat as is.
Further Reading on Beans and Garden Support
If you’re excited to grow more beans in your garden—or want to explore new ways to support and care for them—check out these other posts on my website:
- Growing Beans: How and When to Plant Pole and Green Beans
- How to Grow Asparagus Beans: Growing Yard Long Beans
- Plant Support Netting: The Secret to Perfect Cut Flowers
- How to Grow Black-Eyed Peas
- How to Grow Tepary Beans
- Borlotti Beans: How to Grow This Garden Favorite
- How to Grow Edamame
- How to Grow Lima Beans: Complete Guide and Tips for Hot Climates
You’ll find tips on sowing, spacing, trellising, and more—so you can enjoy a successful harvest and keep your garden growing strong!
Fava beans are a crop I will always make room for in my cool season garden. They’re delicious and simple to grow. Broad beans produce well, fix nitrogen, and leave my soil better than they found it. Plus, the early blooms feed hungry pollinators at a time when flowers can be scarce. I hope you’ll give them a try.
Source for Fava Bean Health Benefits:
Harvard T.H. Chan School of Public Health. The Nutrition Source: Legumes. https://www.hsph.harvard.edu/nutritionsource/legumes/
If this post about how to grow fava beans in warm climates was helpful, please share it.


Hi! Thanks for the great post. I’m wondering how fava beans do in some shade, or do you they need full sun?
They will grow with some shade, as long as they get at least 4 hours of sunlight. Anything less than that and they will probably struggle.
Hello: I’m a microbiologist and I can’t help but notice that while you are recommending a bacterial inoculant of Rhizobium bacteria, you are recommending a product for fungal (Mycorhizzae) inoculant. Those are two different things; one is a bacterium that fixes nitrogen the other is a fungus which is also beneficial to plants but mycorrhizal fungi do not fix nitrogen.
Thank you! I did not realize the difference between the two. I learned something new. Appreciate you taking the time to tell me. I’ve updated the link and blog post. Thanks again.