Peas: Planting, Growing and Harvesting Peas
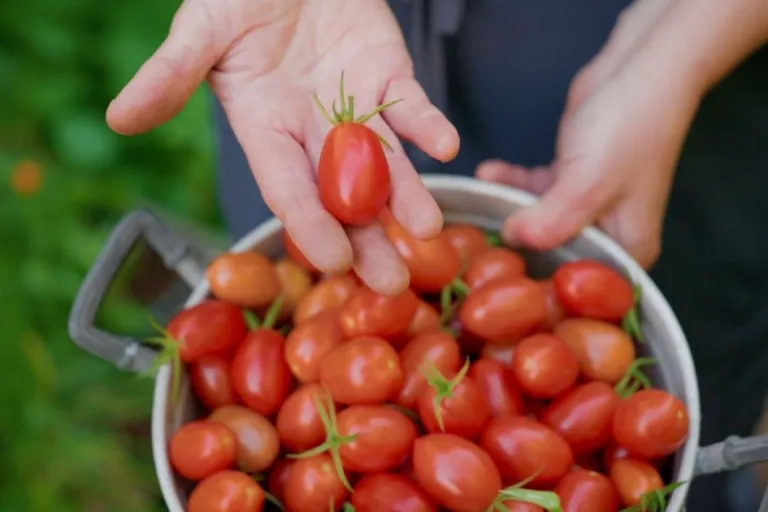
Peas are one of the cool-season crops I look forward to the most because fresh peas from the garden are sweeter than anything you can buy at the store. Peas are easy to grow in your garden, and because they grow vertically, they provide a high yield in a small growing area. Learn how to grow peas with these five tips.

Key Takeaways: Growing Peas
- Fresh peas from the garden are sweeter and easier to grow because they yield well in small spaces.
- Decide which varieties of peas to plant, such as shelling, snow, and sugar snap peas.
- Plant peas at the right time, ideally in loose soil, and directly in the ground for best results.
- Care for growing peas by watering regularly, avoiding excess nitrogen, and providing support for vertical growth.
- Harvest peas early and often to boost production, and store them for up to 5 days for the best flavor.
5 Tips for How to Grow Peas:
1. Decide which varieties of peas to plant
Peas are often divided into three categories – choose which ones you want to plant.

Shelling or Sweet pea (not to be confused with the flower sweet pea) – also called English peas or garden peas. Inedible pod with full-sized edible peas; shell before eating.
Varieties to try: Wando, Iona Shelling Petite Pea Seeds, King Tut Purple Pea

Snow pea – Large, flat, stringless edible pod with small peas. Often used in stir-fry.
Varieties to try: Mammoth Melting Sugar Snow Peas, *Oregon Sugar Pod II Snow Peas (*= highly recommended)

Sugar snap pea – Edible pod with full-sized edible peas. Pick at any stage and eat the entire pod with peas inside.
Varieties to try: Sugar Magnolia Snap Purple Peas, Sugar Snap Peas

Once you have determined which type to plant, choose disease-resistant varieties if possible.
Pea disease resistance codes for seed packets:
- Downy Mildew = DM
- Fusarium Wilt = F
- Pea Enation Mosaic Virus = PEMV
- Powdery Mildew = PM
2. Plant peas correctly and at the right time
- Before planting peas, consider inoculating the seeds with Mycorrhizae. Inoculating the seeds gives the plants a boost, produces larger yields, and helps roots to ‘fix’ the nitrogen in the soil.

- Plant peas at the right time. Peas grow best at temperatures under 70°F.
- In the low desert of Arizona, plant peas beginning in September and continue planting peas until January. Peas are one of my favorite crops for fall. See why they made my list of top 10 easiest vegetables to grow in mild winter gardens.

- In other areas, for spring planting, plant seeds outside about 4 to 6 weeks before your last spring frost. Peas planted in colder soil (between 40°F-55°F) will grow more slowly than those planted in soil that is at least 60°F. Use a soil thermometer to check the soil temperature. Check your local planting guide to see if fall planting is an option for peas in your area.


- Peas grow best planted directly outside in the soil. They have a fragile root system and it’s best to direct seed them.
- To avoid pests and diseases, rotate where you plant peas each year and do not plant in the same spot more than once every 3-4 years.
- Peas do best in loose soil that is not too high in nitrogen.
- Plant pea seeds 1 inch deep and about 2 inches apart.
- For square foot gardening grids, plant 9 peas per square.


3. Care for peas as they grow
- Watering is important for delicious peas. Pea plants do not like to be soggy, but it is important not to let them dry out either. Provide regular watering, especially when plants are blossoming and producing pods.
- Pea plants do not require, nor do they want, extra fertilization. Too much nitrogen results in lush green plants, but few peas. Peas require phosphorus; if your soil is low in phosphorus consider adding bone meal.
- Pea roots are fragile and should not be disturbed. Do not dig around plants. To control weeds and preserve moisture, mulch pea plants when they are about 2 inches tall.

- Provide support for growing pea plants. Provide a trellis for all peas, including bush varieties.
- Peas that grow on a trellis are more productive and less prone to root rot and other diseases.


The tendrils of peas reach out and love to climb. A stick in the ground near the plant allows shorter varieties to climb. Provide a tall trellis for climbing peas. Guide the tendrils to the trellis, and once attached the peas will climb it quickly.
Peas are one of the easiest crops to grow vertically, and a simple ladder, trellis, or other budget-friendly vertical support is usually all they need.

4. Be on the lookout for diseases that commonly affect peas

Powdery mildew often looks like powder on the leaves and vines. Powdery mildew spreads easily. Learn how to prevent and treat powdery mildew.
Pick peas early in the day while temperatures are cool to slow the spread. Destroy infected plants and debris. Choose resistant varieties. Do not save seed for replanting.

Fusarium wilt and other wilt diseases cause vines to dry out, yellow, and then brown and die.
Plant resistant varieties and rotate where you plant peas (3-4 year rotation). Destroy infected plants and debris. Choose resistant varieties.

5. Harvest peas early and often
Harvest peas often to increase productivity. Do not leave overripe peas on the plant; if peas are not picked, this discourages production of new peas.
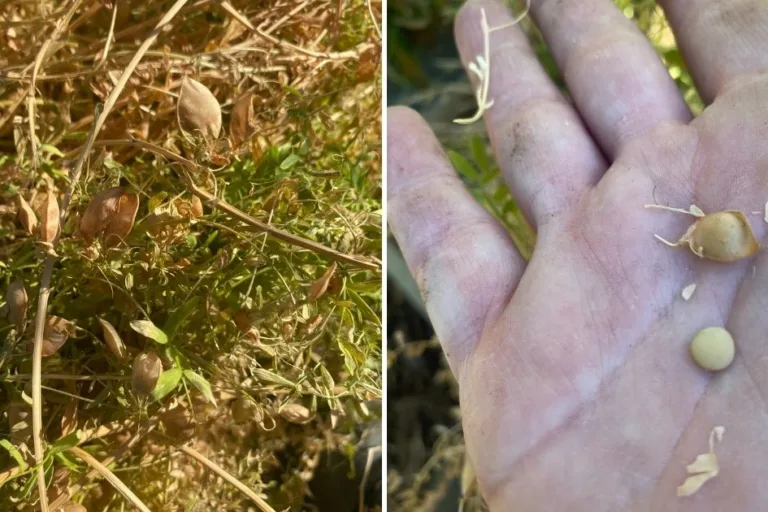
At the end of the season, leave pods on plant until dry to save seeds if desired.

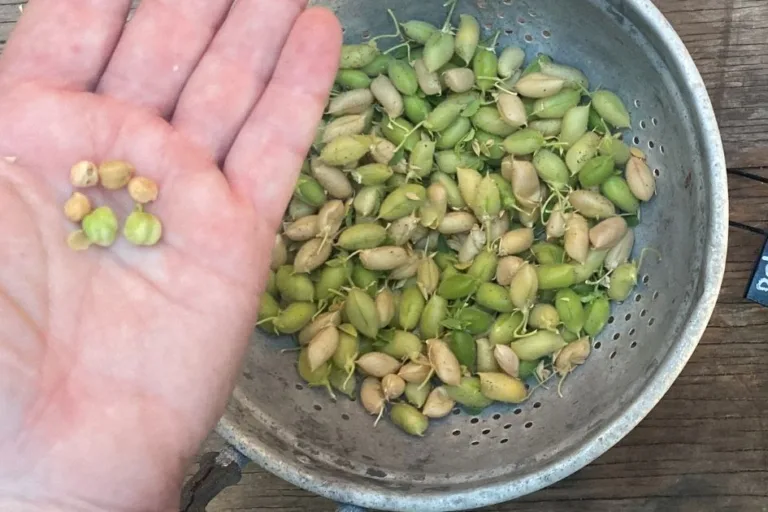
- Harvest sweet peas when pods are round and bright green and shiny. Once pods become dull, they are fibrous and less sweet.
- Harvest snow peas when peas are almost flat inside the edible pods.
- Sugar snap peas are best harvested when peas are well formed but are still small inside the edible pod.


Harvest peas with two hands; use one hand to hold the vine steady and the other hand to pull off the pea.


When pea production ends, cut the plant off at ground level and (if disease and pest free) add stems and leaves to the compost pile. Leave roots in ground undisturbed, and as the roots decompose they will add nitrogen into the soil.

Peas are sweetest when eaten fresh; the sugar in the peas turns to starch within hours of harvesting.
Store peas for up to 5 days in the refrigerator in a paper bag placed inside a ziplock bag. Peas can be frozen or dried for later use, but the texture of the peas will change.


Find vegetables, including peas that grow well in containers in this guide.
Hello,
Something is eating the peas out of the hull and leaving just the hull with holes where the pea would be. I have put pinwheels up to scare away birds and sprayed with insecticides but nothing is working. Any suggestions?
Maybe rats? Could be birds as well. Barrier methods seem to be the most effective.
My peas have started to blossom, no pods yet, but now the leaves have all turned a very pale green. We put in raised beds in January, bought our soil from the Worm Farm, we are using garden grids for watering. Am I overwatering? Not enough water? The soil is moist when I stick my finger down in it, but not too wet. I’m not sure what to do. Any suggestions?
Hi Cindy, you may be overwatering or they may have a fungal disease, or fusarium wilt. During the winter I water about once a week. It may be too late for this year. Varieties to try for next year are Oregon Snow Pods II and Cascadia, both are resistant to fungal diseases, wilt, etc. I’ve had great luck with both varieties. Hope that helps.
Best barieties of peas for low desert AZ?
Any of the varieties I list in the post grow well here if planted at the right time, happy planting!