
Garden Makeover: Before, During and After
The raised beds we made when we first started a garden in 2009 are falling apart, and it is time for a garden makeover.
When we moved into this home in 2008, one of the first things I did was start a garden. We finally had room, and I’d always wanted a garden. I read “Square Foot Gardening” by Mel Bartholomew and went to Home Depot to have them cut the wood for 4’x4′ (1.2m x 1.2m) beds. I used the least expensive untreated pine. My son and I assembled the beds, and my gardening journey began.


Fast forward 12 years. The garden beds produced pounds and pounds of food and have served me well, but are falling apart. It is time for a garden makeover in this area of my garden.

Key Takeaways: Garden Makeover
- The garden makeover is necessary as the old raised beds are falling apart after 12 years of use.
- Before the makeover, I reevaluated the space, considering sunlight, walkways, and the addition of a garden shed.
- I planned to use Deep Root Raised Beds and maneuver them to maximize space while salvaging some plants like asparagus.
- During the makeover, we removed old beds, assembled new ones, and improved the irrigation system for better plant care.
- After the garden makeover, I learned valuable lessons about soil selection and planting proximity to trees.

Garden Makeover: Before, During & After
1. Garden Makeover (Before): Reevaluate space
I’ve learned a few things since I first added these beds. Now that I have the chance to start over, I will do a few things differently. It’s like remodeling a house you already lived in. I knew what I liked about the space and what needed to change.


Things I considered before making a plan for this garden makeover:
This area doesn’t get a lot of sunlight and the gardens aren’t as productive as the other areas of the yard. However, the partial shade is an advantage for some plants in the warmer months.
We need a wider walkway on one of the sides. Having the beds right in the middle didn’t give us quite enough room.

I’d like to maximize the open area at the end of the garden to add a garden shed.

My early beds were only 6 inches (15 cm) tall; this wasn’t deep enough.
2. Garden Makeover (Before): Make a plan and obtain supplies
I’ve loved the Deep Root Raised Beds from Gardener’s Supply that I have in other areas of my garden and knew I wanted to add those. I already had Garden Grids from Garden in Minutes for this area, so I wanted to keep the bed sizes the same and use the existing grids.

The plan for the garden makeover included doing the following:

Move the beds closer to the house to maximize the sunlight and create a wider path in the garden.
- The plan is for the new beds to be 2 feet (61 cm) away from the house and 2 feet (61 cm) apart.
- This allows for just over 3 feet (91 cm) on the opposite side for a wider pathway.

Line up the first bed with my kitchen window – I love planting sunflowers in this bed and watching the birds through the window.

Decrease the beds by one, and move them closer to the front of the garden to maximize the space at the back of the garden to eventually add a shed.

Hopefully salvage some plants, especially the asparagus. Move the asparagus to an area with more sunlight in another part of the yard.
Supplies needed:
- 3 4×4 Deep Root Raised Beds.
- 1 4×6 Deep Root Raised Bed.
- 1/2″ poly tubing fittings to attach the Garden Grids.
- Growing in the Garden Raised Bed Mix to fill the beds.

3. Garden Makeover (During): Carry out plan

Demo day was a lot less dramatic than I had imagined. The beds literally fell apart with just a little help from me.
Once the old beds were removed and I took out the Garden Grids, it was time for the makeover to begin.

My son helped me put together the new Deep Root Raised Beds from Gardener’s Supply. It’s important to put the beds together on a level surface to ensure the beds are level.

We transferred plants to a holding area until they could be replanted.

The asparagus roots were dug up and moved to a different part of the yard that will receive more sunlight.

We pushed back the bark and put the first bed in place, transferring the soil from the old location into the new bed once it was in place and leveled.

We put the beds in place one by one, leveling and measuring each time.

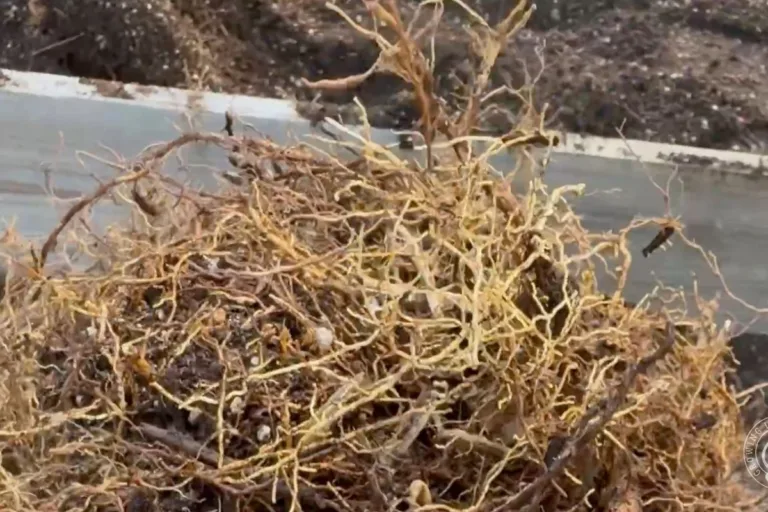
One bed had a surprising amount of roots from the neighbor’s lemon tree. (No guilt about using those lemons that hang over the fence now!) Those roots eventually came back and filled the bed, so I installed a root barrier along the side yard to keep them out.

We added 1/2″ tubing into each bed (they will connect to the Garden Grids) and buried the tubing between each bed.

We filled up the beds with Growing in the Garden Raised Bed Mix from Arizona Worm Farm.

I reinstalled the Garden Grids, but the pressure was off (too much pressure at the beginning, but not enough at the end of the line).

Because of the water pressure issue, we had to run a direct line to each bed. We ended up adding an additional valve to the sprinkler box, and now I can turn on the Garden Grids and program them from my phone.
Now for the fun part! I replanted the herbs that were in the old beds and added new plants and seeds and mulch to the beds.

4. Garden Makeover (After): Evaluate

This garden makeover was a much anticipated and enjoyed project. I’m really happy with how everything turned out. Throughout this process I learned the following things:
One of the garden beds had a surprising amount of roots. I will be more careful planting trees near beds in the future. When roots do invade garden beds, check out this guide on how to keep tree roots out of raised beds.
I wish that I had tested and redone the Garden Grids before filling the beds. Then the irrigation tubing (which connects to the Garden Grids) would not be on the outside of the bed.
The premixed soil from Arizona Worm Farm was a game changer; it made filling the beds so simple. In the past, my soil was always mixed together by hand.

Ready to learn more about garden design? Join me for in-person classes or online in my monthly Growing in the Garden Academy. I cover this and dozens of other timely gardening topic. Visit Patreon to start learning today, and don’t miss my class: Garden Design Fundamentals.





I’m commenting long after this post debuted, but I’m curious about the orientation of this side yard. The beds that you moved closer to the house — which direction do they face? And the open area at the end for the eventual garden shed — where does that lie?
I’ve been experimenting with growing flowers, veggies and (eventually) fruit trees in my Mesa side yards. Understanding how you placed things in regard to north/south/east/west might help inform my space. Thank you for all the practical information.
Hi. If you look at this post: https://growinginthegarden.com/garden-planning-in-5-simple-steps/ There is an ariel view (with directions) of my garden. Hope this helps.
How many raised beds do you currently have to be able to feed your family and preserve?
I have 17 raised beds, most are 4×8, but several are 4×4.
Did you use a root barrier, if so what material?
I’m going to install one. This is the type I’m looking at using: https://amzn.to/3ehD4bz