How to Use Grow Bags Successfully in Hot Climates
I love grow bags because they make it easy to garden almost anywhere. They’re portable, they drain well, and they’re a simple way to add growing space without building a bed or buying expensive containers. But in a hot climate, grow bags can heat up and dry out quickly if you don’t use them correctly. Get more tips for gardening in hot climates in this guide.
Fortunately, even in hot climates, grow bags can work really well. Put them in the right place, choose the right crops, give them enough soil, and use a few simple techniques to keep them from drying out. When you do that, grow bags can be a simple and inexpensive way to garden. And, if you’re new to container gardening, start with my guide to container gardening for beginners.
Key Takeaways: How to Use Grow Bags in Hot Climates
- Gardening in grow bags is flexible, portable, and offers excellent drainage for healthy root systems.
- In hot climates, grow bags can dry out quickly, so thoughtful placement and techniques are essential.
- Group grow bags together, use an olla for thirsty crops, and add mulch to retain moisture.
- Choose larger bags to help with moisture retention and root growth; they are easier to manage.
- Grow bags are ideal for compact crops like peppers, cucumbers, and herbs, making them great for small spaces.
Table of contents
Why garden in grow bags?
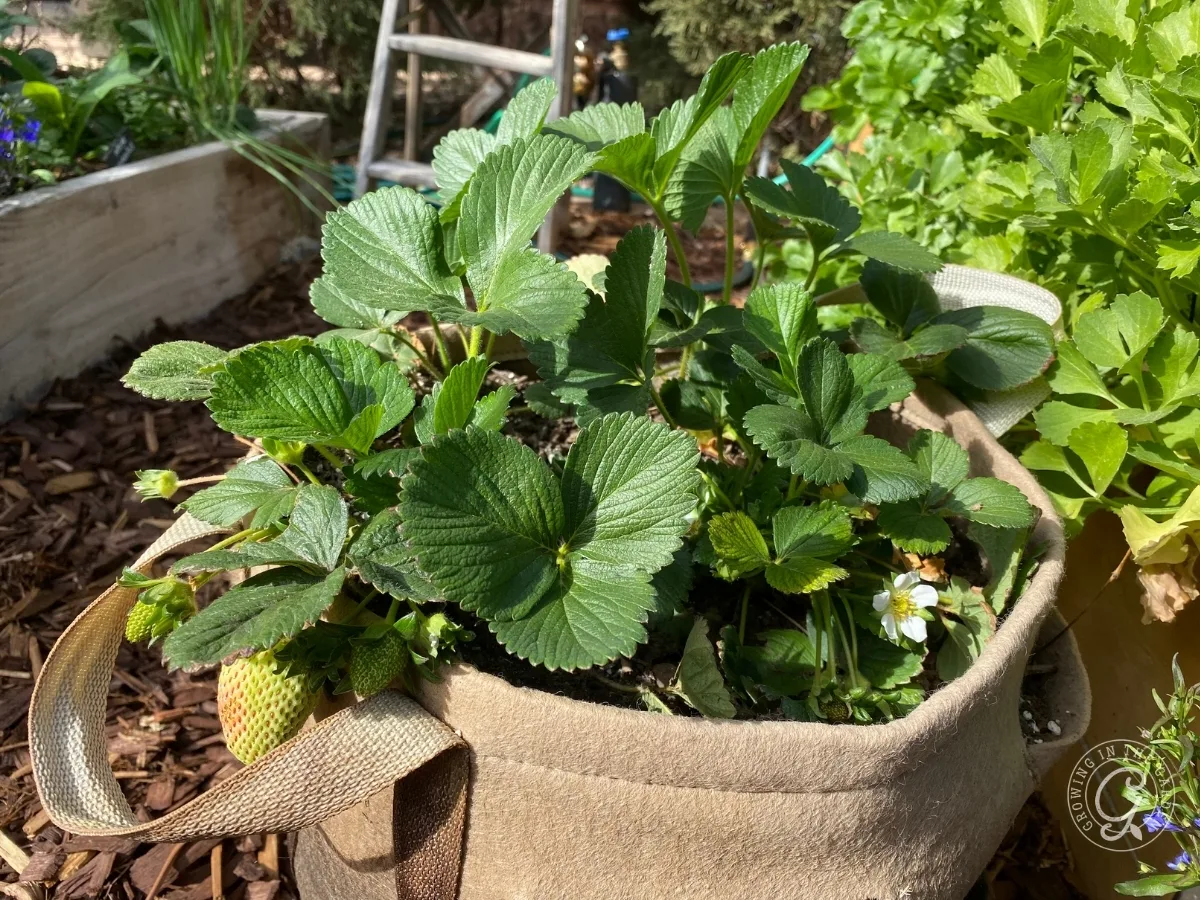
- Grow bags have a lot going for them. They’re lightweight, easy to store when not in use, and simple to add wherever you need more growing space. They also have excellent drainage, which helps prevent soggy soil and overwatering.
- Unlike many traditional containers, grow bags allow roots to breathe. The fabric sides help air-prune roots instead of letting them circle the container, which usually leads to healthier root systems and stronger plants.
- One of the biggest advantages of grow bags is flexibility. You can move them to take advantage of the best sunlight in cooler months, and in hot weather, you can move them into better microclimates. That flexibility is one of the main reasons grow bags can work so well in difficult climates.
What makes grow bags harder in hot climates?
- Grow bags also come with a few challenges. Because the fabric allows more airflow, the soil can dry out faster than it does in other containers. That’s often the biggest frustration people have with grow bags.
- They can also need more frequent fertilizing because they hold a limited amount of soil. And once a large grow bag is full, it can be awkward to move, even though portability is one of its advantages.
- In a hot climate, placement matters even more. A grow bag set on concrete or next to a block wall in summer will heat up much faster than one placed where it gets morning sun and natural afternoon shade. That doesn’t mean you shouldn’t use grow bags. It means you need to use them thoughtfully.
How to make grow bags work in hot climates
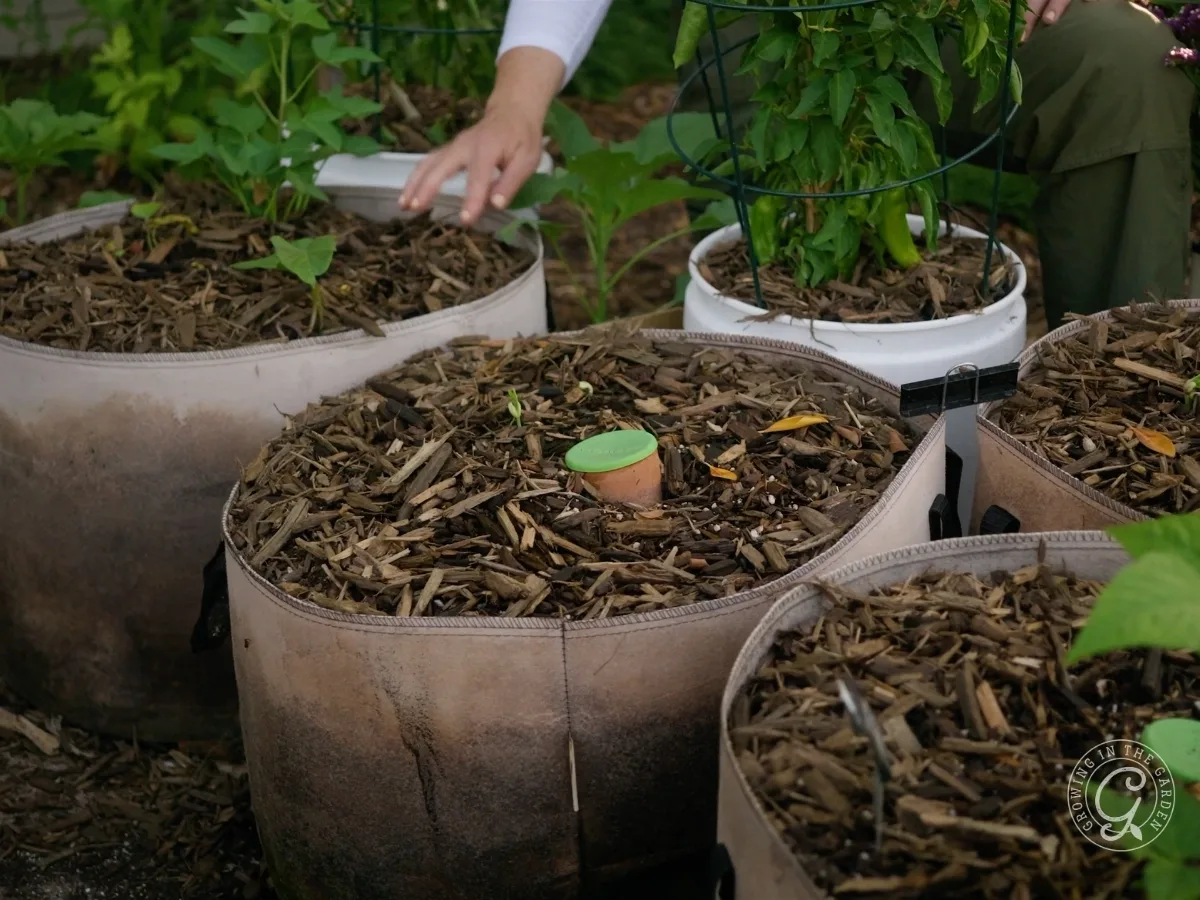
Group grow bags together
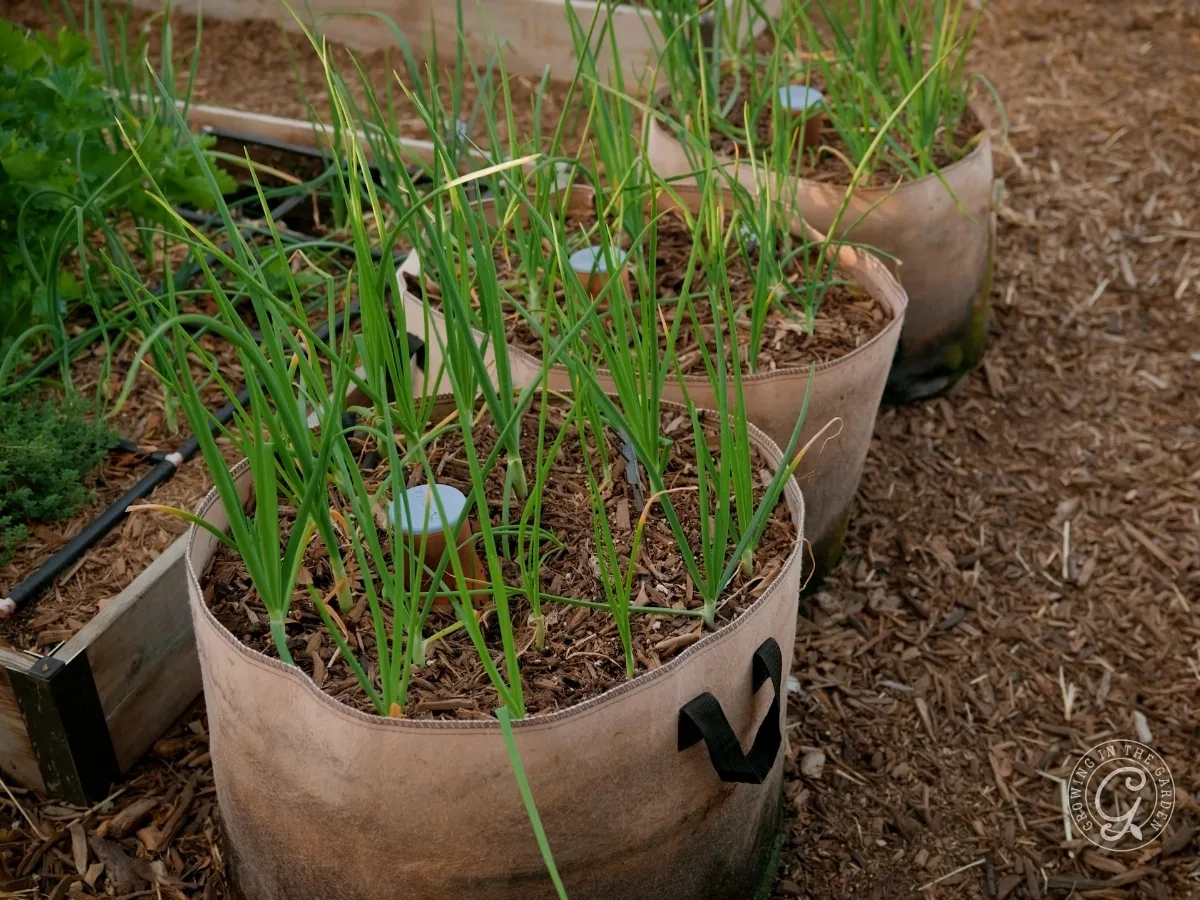
When possible, group grow bags close together instead of spacing them far apart. Grouping them can have an insulating effect and help slow down moisture loss. It also makes watering easier.
Use an olla for thirsty crops
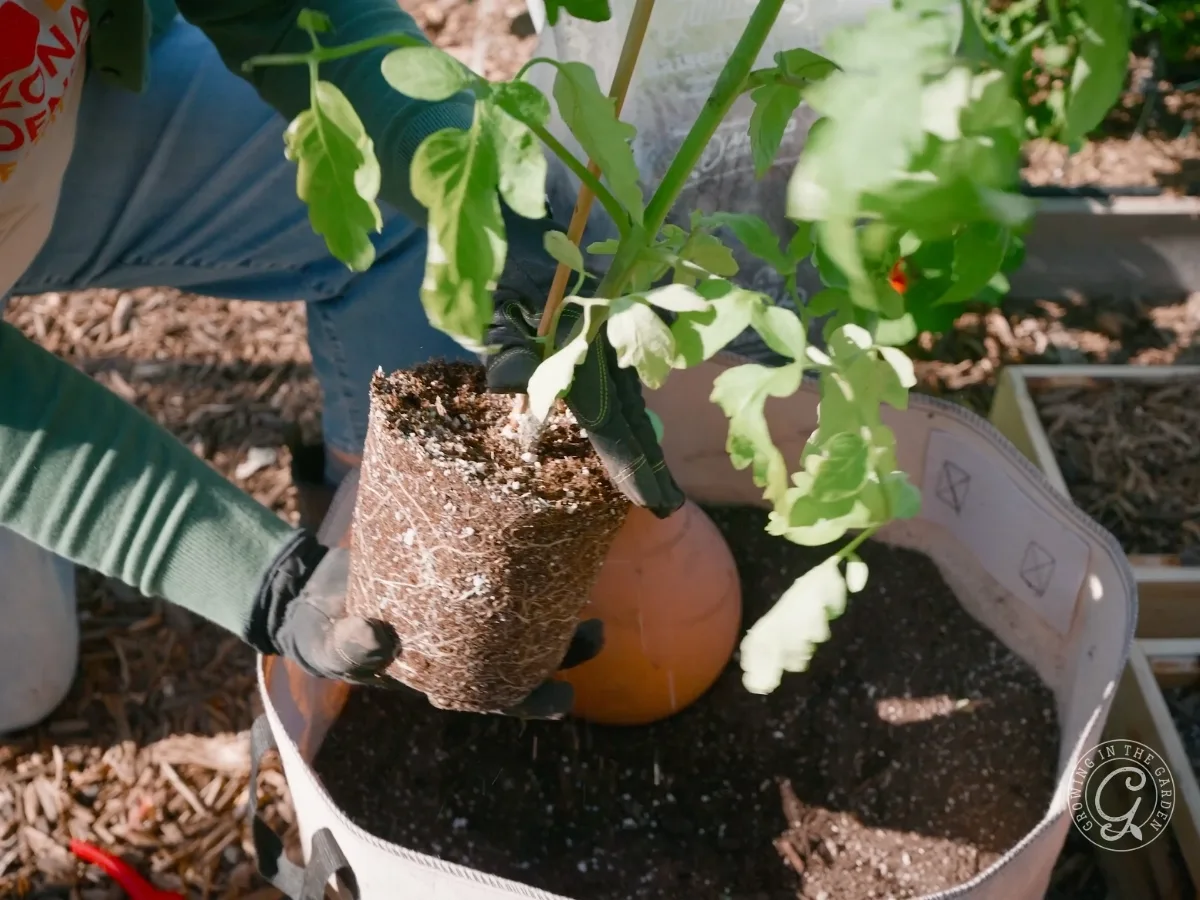
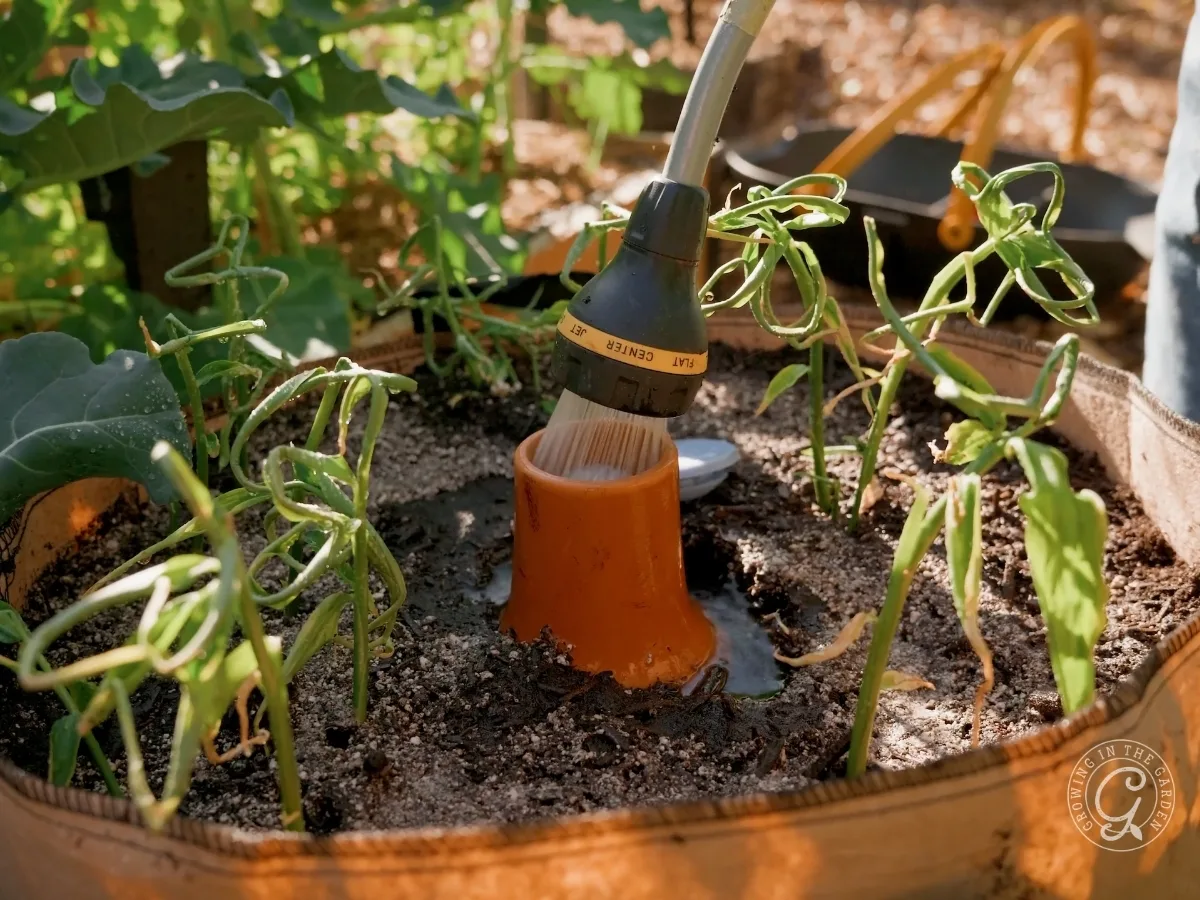
- Because grow bags dry out more quickly, thirsty crops often do better if you add an olla or use a self-watering setup. This can make a big difference for crops that need more even moisture, especially in hot weather.
- I use these ollas in my grow bags.
For more help with watering, read the best way to water containers.
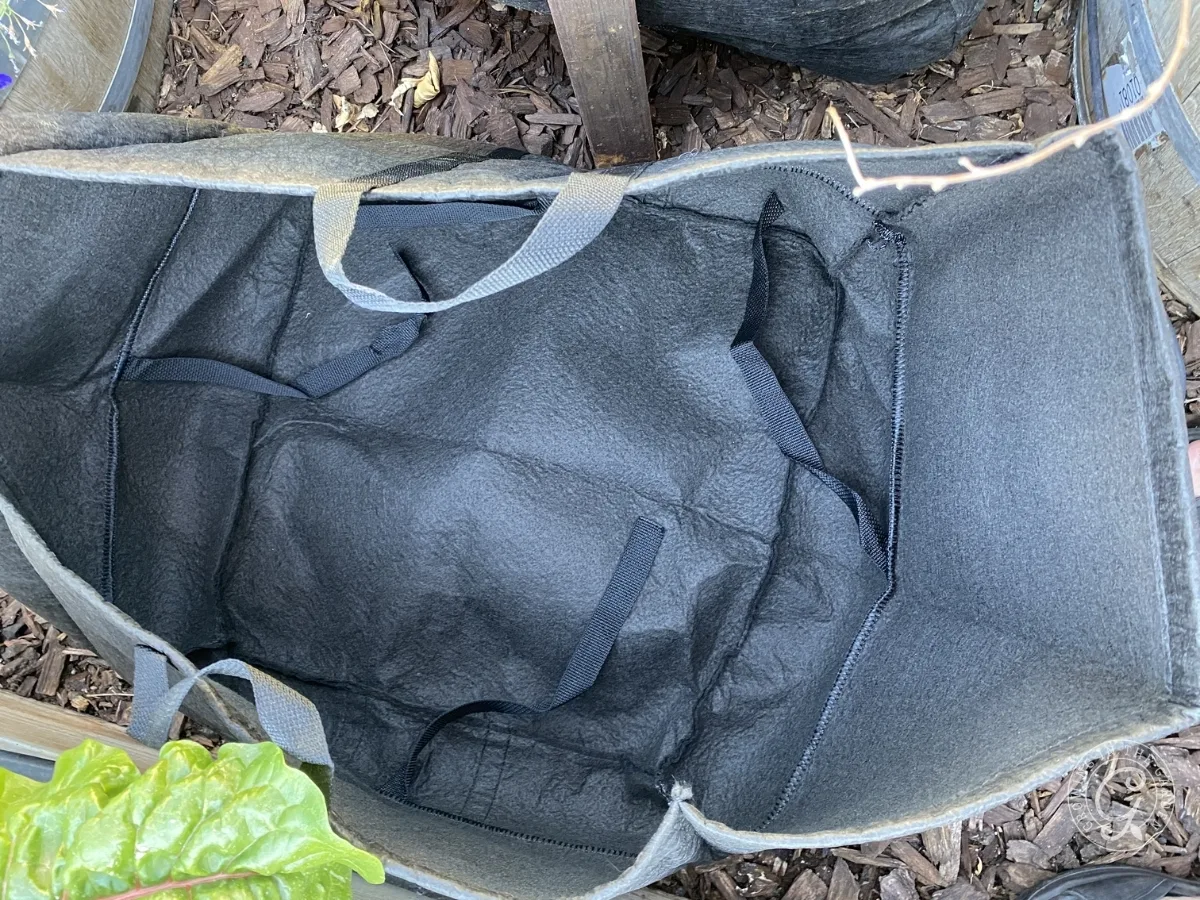
Start with a good-quality grow bag
- Not all grow bags are the same. Look for sturdy grow bags with strong handles that will hold up for more than one season. Thin, flimsy bags usually don’t last as long and can be frustrating to work with.
- I use these grow bags, and they’ve held up well in my garden.
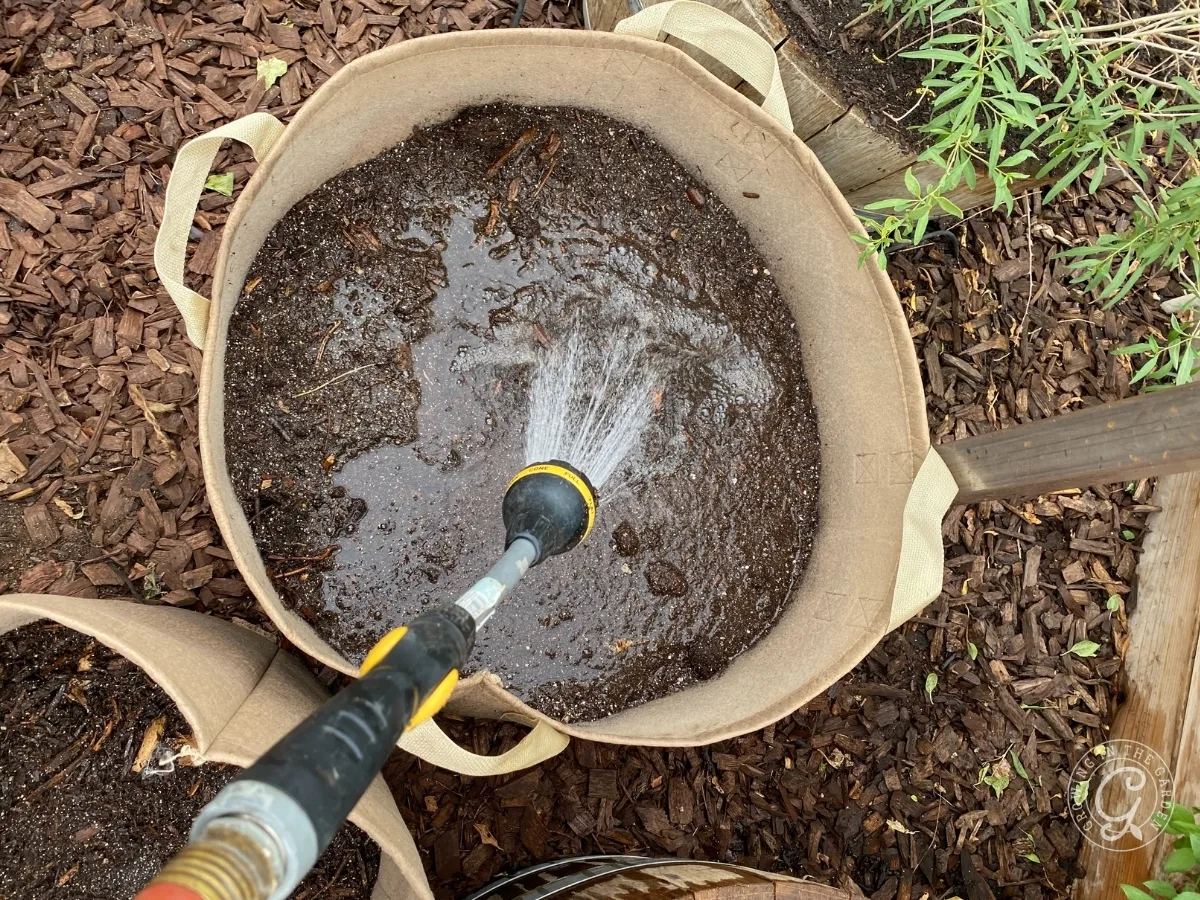
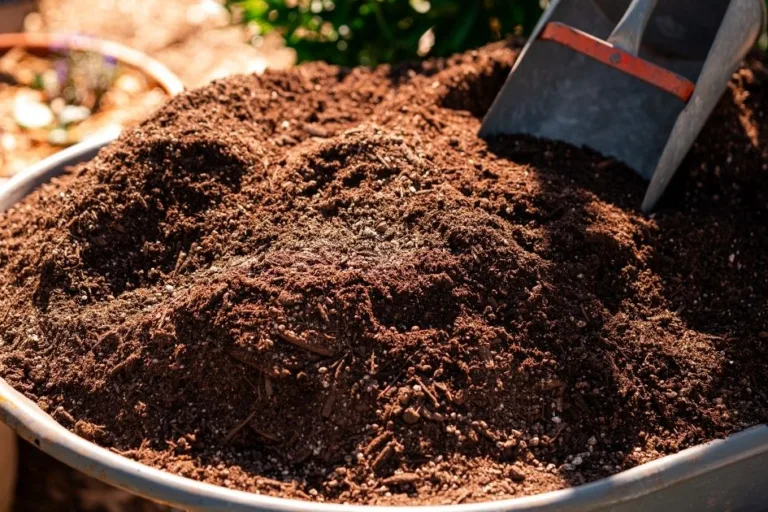
Use the right soil
- Soil matters a lot in grow bags. Regular garden soil is too heavy and compacts too much. Grow bags work best with a light, well-draining mix that still holds enough moisture to support plant growth.
- I use the Raised Bed and Container Mix from Arizona Worm Farm. If you aren’t local, this bagged potting mix is a good option.
Pro tip: I also like to mix in wool pellets. They help hold moisture a little longer and add slow-release nitrogen, which can be especially helpful in grow bags where soil dries out faster and nutrients get flushed out more quickly.
Learn more about the mix I use in my guide to the best soil for raised beds.
Fertilize regularly
- Because grow bags drain so well, nutrients get flushed out more quickly. That’s why I feed plants in grow bags more often. During the growing season, I use a liquid organic fertilizer once a month at a light dose.
- This is the liquid organic fertilizer I use.
Put them in the right place
- In hot weather, place grow bags where they get morning sun and natural afternoon shade if possible. Avoid putting them on concrete or right next to block walls during the hottest part of the year. Those surfaces reflect and hold heat, which makes the soil heat up faster and dry out more quickly.
- In cooler months, those same warmer spots can be helpful. One of the best things about grow bags is that you can move them as the season changes.
- Adjust for sunlight. If needed, add shade cloth during the hottest part of the season to help keep the soil cooler and slow down moisture loss. In cooler months, move bags back into more sun. That’s one of the biggest advantages of grow bags. You can adjust as conditions change.
Choose the largest size you have room for
Bigger grow bags are usually easier to manage because they hold more soil, dry out more slowly, and give roots more room to grow. If you’re deciding between sizes, go bigger when you can.
If you’re not sure which bag size to use, this guide to container sizes will help you choose the right container for each crop.
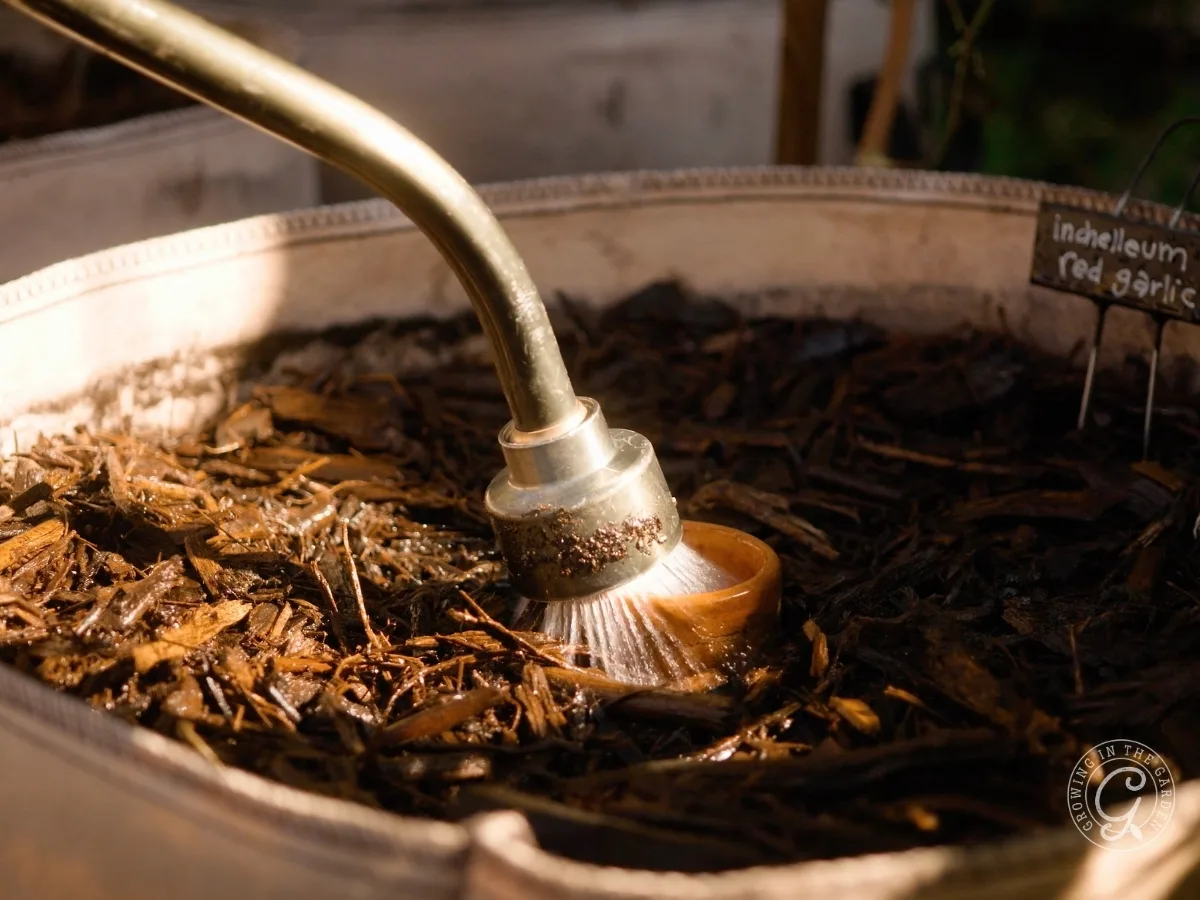
Add mulch
Mulch matters in grow bags, especially in hot weather. A layer of mulch on top of the soil helps slow evaporation, keeps the soil cooler, and makes watering easier.
Use the seasons to your advantage
Grow bags are portable, and that’s one of their biggest strengths. In summer, move them into better microclimates. In cooler months, move them into areas that get more sunlight. Use that flexibility to your advantage.

Pro tip: If you’ve just moved to a new location, grow bags are a great way to get started. You can begin gardening right away while you learn how the sunlight moves through your yard and where the best microclimates are before putting permanent beds in place. If you’re still figuring out where to put your garden, this post about backyard garden design can help you think through layout, sunlight, and how to use your space well.
How to set up a grow bag step by step
Setting up a grow bag properly from the beginning helps ensure a better harvest.
- Step 1: Put the grow bag in place
- Step 2: Fill it about halfway with potting mix and water the soil well
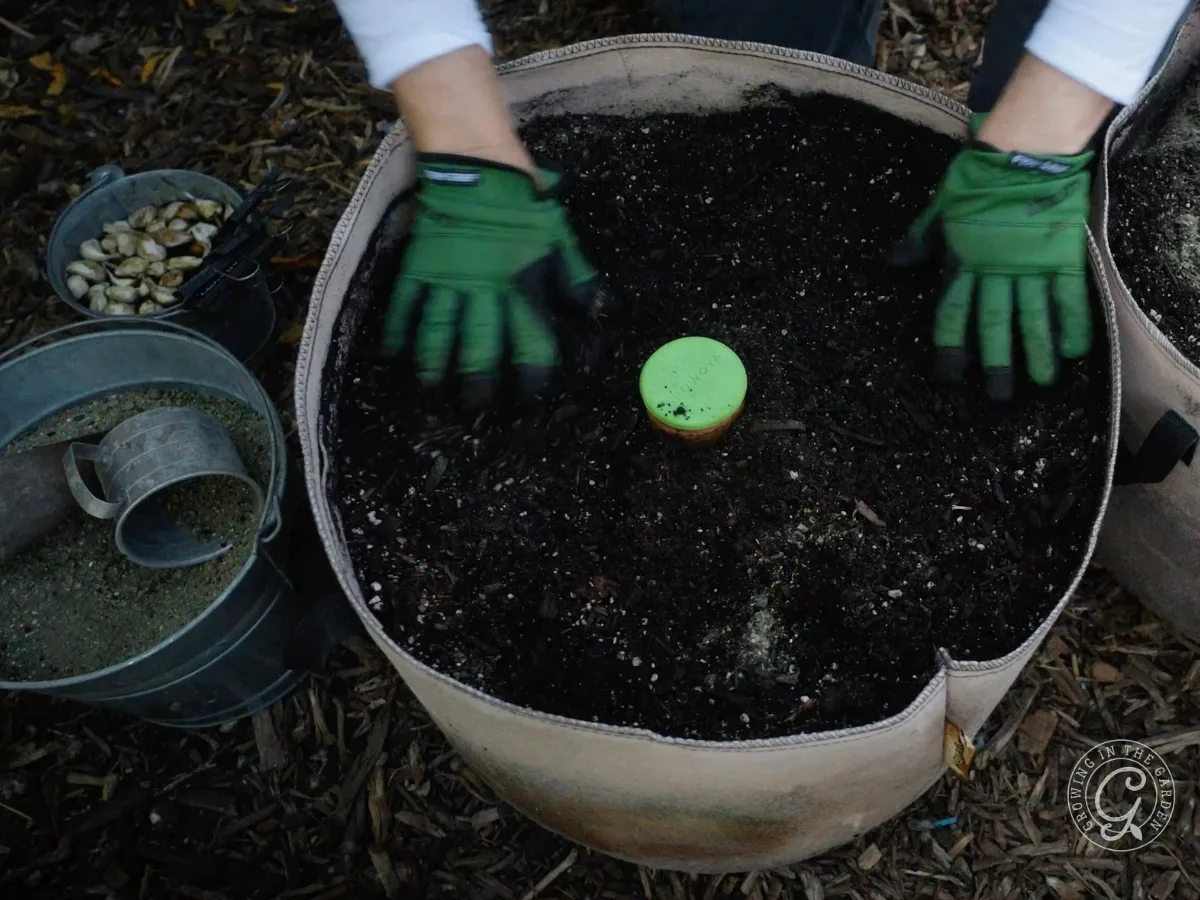
- Step 3: Add the olla and finish filling the bag with soil
- Step 4: Water again and fill the olla
- Step 1: Add plants or seeds
- Step 2: Mulch the top
Grow Bag Size Chart
Use these sizes as a minimum guide. In hot climates, larger grow bags are usually easier to keep watered and productive.
Crop names in the chart below link to detailed growing guides.
| Grow Bag Size | Best For | General Guidance |
|---|---|---|
| 2 gallons | Basil, thyme, lettuce, radishes, green onions | Good for quick crops and smaller herbs |
| 3 gallons | Carrots, beets, strawberries, cilantro, dill, parsley | Better for compact crops that need a little more room |
| 5 gallons | Peppers, eggplant, cucumbers, broccoli, potatoes, ginger, turmeric | Good for one medium crop per bag |
| 10 gallons | Tomatoes, sweet potatoes | Better for larger fruiting crops |
| 15–20+ gallons | Dwarf fruit trees, larger plantings, multiple smaller crops | Easier watering and more room for roots |
What grows best in grow bags?
- Grow bags are a good choice for many vegetables, herbs, and compact crops. They’re especially helpful for gardeners who want flexibility, need to garden in a small space, or are still learning the best growing areas in their yard.
- Some of the best crops for grow bags include peppers, eggplant, cucumbers, potatoes, lettuce, radishes, kale, green onions, carrots, beets, strawberries, basil, cilantro, dill, parsley, ginger, and turmeric.
- When choosing what to grow, look for compact, bush, or dwarf varieties when possible. Those are often easier to manage in grow bags than large vining or sprawling crops.
If you want ideas for easy crops to start with, here are the best vegetables for container gardening.
Herbs are another great option. Read more about how to grow herbs in containers.
A good rule of thumb for grow bags
If you’re not sure what size grow bag to use, choose the largest one you have room for. More soil means more room for roots, slower drying, and fewer stress problems during hot weather.
Grow bags work best when you use their strengths to your advantage. They’re portable, they drain well, and they encourage healthier roots. But they aren’t a set-it-and-forget-it solution, especially in summer. Use smart placement, enough soil, mulch, and good watering habits, and they can be one of the easiest ways to grow a lot in a small space.
Grow Bag Gardening FAQ
Grow bags are used much like other containers, but they need more attention to placement and watering. Fill them with a light potting mix, place them where the crop gets the right amount of sunlight, water consistently, and mulch the soil surface. In hot climates, grouping grow bags together, using an olla, and giving them natural afternoon shade can make a big difference.
The biggest downside is that they dry out faster than many other containers, especially in hot weather. They may also need more frequent fertilizing because they hold a limited amount of soil. Those aren’t reasons to avoid them, but they do mean you need to be more intentional about watering and placement.
Use potting mix all the way through the grow bag. Don’t add rocks or filler at the bottom. Grow bags work best when they’re filled with a light container mix that gives roots room to grow and lets water move evenly through the soil.
Grow bags are best for crops that do well in containers, especially peppers, eggplant, cucumbers, potatoes, lettuce, radishes, kale, carrots, beets, strawberries, herbs, ginger, and turmeric. Compact and bush varieties are often the easiest to manage.
More resources if you want to keep learning
I wrote a book about container gardening that covers everything from choosing containers to harvesting your first crop. Learn more about How to Grow Your Own Food: A Beginner’s Guide to Container Gardening in this post or purchase the container gardening book here.
If you want to learn even more, check out Growing in the Garden Academy, where I teach monthly classes on timely gardening topics, including container and grow bag gardening.
If you enjoyed this post about grow bag gardening, please share it.


I was given some 30 gal grow bags. Is that too big for tumeric and/or ginger?
Not at all.
Thank you for all the great information. Because of your YouTube video I decided to try growing peanuts. Do you think they would be ok in a grow bag? I am just starting my garden and growing everything in pots and gallon milk jugs. Thanks again!
Yes, that should work. I would use at least a 10 gallon size.
Thank you for your soil combo suggestion. I would have probably used a ‘better’ potting soil which would have gotten heavy. what size bag would you suggest for a zuke plant suited for patio gardening, and regular sized tomatillos? We are in Lake Havasu, zone 9B I think. Thank you! Laura
at least 10 gallons, 20 would be even better.
i have been using grow bag for 5 yr now I love them I used to grow vegetables in raisin bed but my legs r to bad now the grow bag r great I plant spring and fall vegetables i have 30gals 25gals 20gals and 15gals and smaller which I use for letters
Yes please
Ten gallons is still small for tomatoes, unless you grow all determinates, especially in the desert. The moor soil, the more moisture is retained and available for the plant. I use 15 gallon ones, which is the largest I can handle.
Good point. 10 gallons is the minimum I recommend, but I like that you made the distinction about which type of tomato for that size.
Would like to try grow bags, can’t seem to find the lighter colored ones, any suggestions? Do you do talks for garden clubs, like in Sun Lakes? Thanks
I’ve used these https://amzn.to/45j1sme and these https://amzn.to/3GZMvuC My schedule is booked for the fall season, but you could email me for details to book something next year for your garden club.
Hi. Is it better to have the grow bags off the ground or can they be directly on gravel or a paver? Thank you for all the great information.
There are benefits to both ways. It depends on what you have underneath; if they can be on the ground, that is usually better.
I recently sent a question regarding the plant bags. This will be my first attempt. Can you put small plants or just seeds.
Hi Leslie! You can start seeds or small plants in grow bags. Either one works well. Keep them well watered until seedlings emerge or the plant gets established and make sure you have good soil.
I am interested in growing herbs and vegetables in grow bags. Can you start small plants in a grow bag or only seeds? I live in Forest Hills, New York
Hi. Yes, you can start by transplant in grow bags as well. Keep seedings well watered until they settle in.
can we grow fig , lemon in grow bag?
It would need to be a large grow bag. Keep it well watered in the summer.
I like the grow bags featured on this page. Where can I buy them?
Gardener’s Supply – If you click on the images of the grow bags it should take you to the type of grow bag pictured.
Hi,
I live in Converse, TX. The heat out here is also pretty intense, would all of your great ideas/suggestions work for gardening in my area zone 8B ?
Hi Karla, Some of the dates will be different, but the general principles will be the same.
My potatoes in 10 gallon bags are growing like crazy. Their stems and leaves are near two feet tall above the top of bag. I got concerned a strong wind would not them over, so I dug small holes to place them in for stability
How tall will the stems and leaves grow too?
My first attempt with growing potatoes
Wow! Those are some tall potatoes. Hopefully your bag is filled all the way up with soil. They should begin flowering and dying back at some point. That seems taller than any I’ve grown. You may have a lot of nitrogen in your soil.
What are some ideas on how to transfer carrots from a small grow bag to a large grow bag
It’s best not to transplant carrots or other root vegetables (except beets) – I would leave them in place in the smaller grow bag.
@LeeAnne F. Skorich, sow in place, they are extremely difficult to transplant successfully.
Thanks for all the wonderful information you post on your YouTube videos and blog!
We are in North Phoenix and I purchased 10 gallon grow bags for our starter Garden.
I used the Mel’s mix formula but I’m worried I screwed up the proportion as I counted the three cubic feet of compressed peat moss as 3 cubic feet.
My ratio was 3cu ft peat moss, 3 cu ft vermiculite, and 3 cu ft composted steer manure.
Then I read one of your footnotes that explained that the peat moss expanded and now I’m not sure if I need to unplant my peppers and remix my soil. The transplants were put in Tuesday and Wednesday.
If there’s any way you have time to help on this I would greatly appreciate it.
Thanks in advance!
You’re probably ok, check the watering. It will hold water pretty well because of the extra peat moss. In the future I would also combine different types of compost rather than just the composted cow manure to add a variety of nutrients.
Thx! The recent cool days combined with the extra peat moss have kept the grow bags reading “wet” when the water meter is fully inserted. I will figure it out and recalibrate in the fall season. Your answer is very much appreciated
Whew you open bags and fill with more dirt. Do I close the bad back up.
Yes, I would close them back up.
@Liz, yes. Otherwise you may find a mouse, living or dead, as I did once.
Funny thing– I’m in Tucson too, and using my first grow bags! I’ve planted onions, pak choi, arugula, turnip greens, dandelion greens, scarlet runner beans, sweet peas and will be planting potatoes and gourds soon. Everything’s growing like crazy; I wasn’t sure how well the greens would do but they’re all really growing well. Have to say, I love how I can just keep the extra bags folded up til I need them; I’ve been using them to tote mulch and so forth around my backyard too, they’re so tough!
Wow! That’s a lot growing. Good for you.
Thank you for this article. I’m in Tucson and just started a bunch of grow bag gardens and I was wondering (after the fact) if grow bags work in our environment. This is reassuring. Grow bags are such a great idea! Not as big an investment as raised beds or livestock tanks or even containers/pots. Except I’ve run out of soil mix. That’s an investment in itself.
They really are an economical way to get started or add more space. I agree the soil is an investment. Best of luck to you with your new bags.